So, you’ve been running Windows 10 for a while now, and today is the day when you stopped hearing any sounds from your computer? Moreover, you tried to troubleshoot the issue, but the operating system is adamant that there is no fix, and you get this message: ’audio services not responding’. This can be very frustrating, so we advise you to use our guide and fix the problem without any external help.
There are many reasons why the audio services have failed you, some of the most common ones are:
- Windows Audio services are running incorrectly
- an outdated audio driver
- a damaged audio driver
Here are our five fixes, and if the first method doesn’t help, try the next. They are listed from the least invasive ones to the most time-consuming.
Fix 1. Use Windows troubleshooter.
This will allow you to solve the issue.
Pro Tip: It is possible to fix many PC issues by using the PC Repair tool. PC Repair is easy to use and reliable Windows optimization software developed to fix hundreds of system issues.
Special offer. About Outbyte, uninstall instructions, EULA, Privacy Policy.
- Step 1. Use the control panel to open the search box and type in ‘troubleshooting’. This will take you to the results where you have to choose “Troubleshooting” and then pick “Hardware and Sound” out of all the variants.
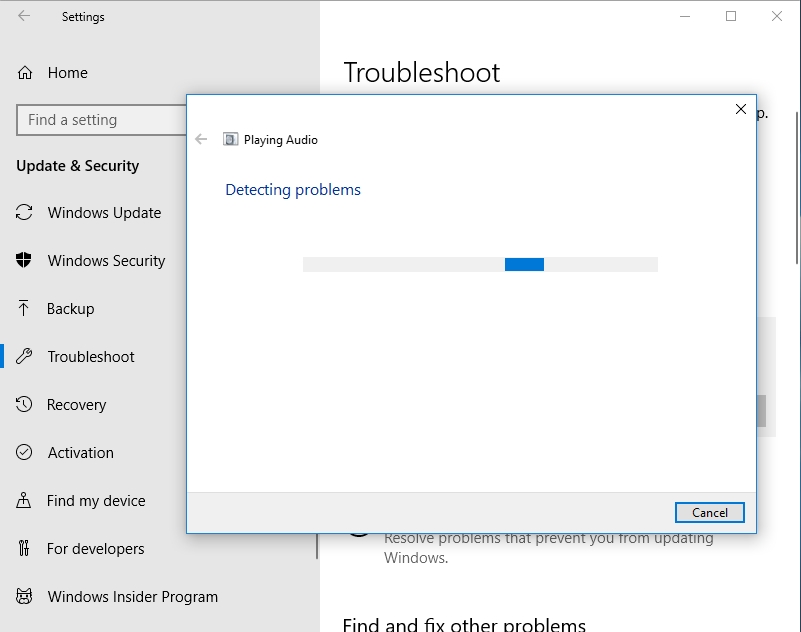
- Step 2. The Hardware and Sound pad will open with options for the “Sound” and “Device”. You need to select “Playing Audio” inside the sub-category.
- Step 3. You have to click “Find and fix problems with playing sound” and in the Advanced Options, select the box that states “Apply repairs automatically”.
- Step 4. Click “Next”, this will take you to the automatic diagnostics that the Troubleshooter will execute.
- Step 5. When asked to ‘click Apply this fix and Reboot’, agree. This will apply changes after the reboot and hopefully solve your issue.
Fix 2. Setup Windows Audio services.
This process is easy enough and Windows will guide you through it, but we have specified the instructions for you.
- Step 1. Press Windows key and the letter “R” on your keyboard. In the “run” pop-up window, type in “services.msc” and hit Enter to run the program.
- Step 2. In the dropdown list, find the following services:
- Windows Audio
- Windows Audio Endpoint Builder
- Plug and play
- Step 3. One by one, open them and make sure that they are set to Automatic in their Startup Type. You will see the status in the column marked “Startup Type”. All three should say ‘Automatic’ and ‘Running’.
- Step 4. Double click on the Name of the service and in the menu, select “Restart”. The settings should comply with the ones you need, otherwise proceed to Step 5.
- Step 5. Choose the corresponding service and double-click the line. Inside the properties window, set them to ‘Automatic’.
- Step 6. Check that the service status is ‘Running’. Select “OK” to save the settings.
- Step 7. Restart your computer to apply the changes.
Fix 3. Modify Windows Audio components.
This fix is a more advanced tweak in the Windows audio properties. To apply the changes, you need to follow the steps.
- Step 1. Access the RUN menu and open ‘services.msc’.
- Step 2. Double-click on the properties.
- Step 3. Select “Dependencies’ in the tab menu. Here you will get a list of all the components what the service depends on. Expand it (press the + sign).
- Step 4. Find the following components in the drop-down menu
- Remote Procedure Call (RPC)
- DCOM Server Process Launcher
- RPC Endpoint Mapper
- Step 5. Make sure that all of the components are marked as “Running” in the Status column.
- Step 6. By right-clicking on each of the components, access the menu and select “Restart” for all of them.
- Step 7. Reboot your computer to apply the changes.
Fix 4. Update the audio driver.
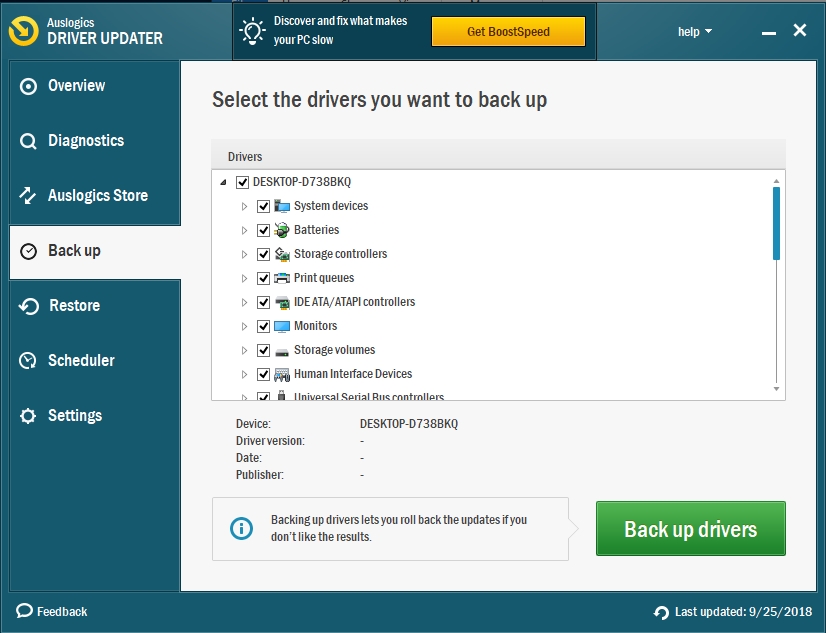
Essentially, what the driver does is provide a link between the software and the hardware parts of your computer. Software requirements are different from hardware specifications and sometimes they don’t exactly match. The driver acts as a translator of sorts, mediating between the two. That is why it’s very important to keep your drivers updated. It should come as no surprise that you cannot install a Windows 7 Sound driver in Windows 10. If you don’t want the hassle of looking for the exact type that you need for your computer online, we suggest an easy fix – install a driver updating tool and automate the whole process. The latest Auslogics Driver Updater will scan your computer for drivers that need updating and will automatically find the right type for your personal computer. After detecting the problematic driver, the Driver Updater will update it without ever bothering you or creating any unnecessary troubleshooting. These scans can be scheduled, and you will never have to worry about a faulty driver again.
Fix 5. Reinstall your audio drivers.
To reinstall your audio driver, you need to uninstall it first. Follow the steps below to get through the procedure correctly.
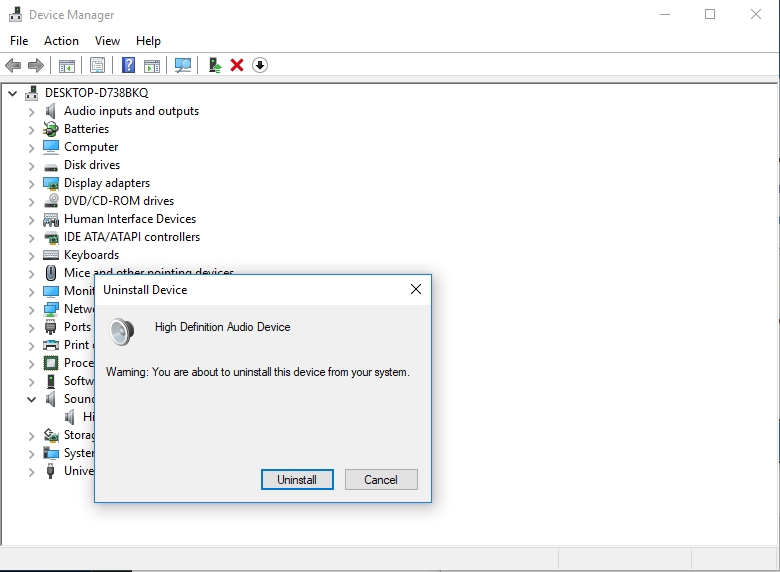
- Step 1. Right-click the Start button to access the Device Manager.
- Step 2. Pick ‘Sound, video and game controllers’ and then right-click on the audio driver that you have installed. This will give you the option to “Uninstall device”.
- Step 3. Click “Uninstall”.
After uninstalling the driver, you need to download and install a new audio driver for your Windows. To do that, you need to know your audio card’s manufacturer. Nowadays, they usually have the drivers on their websites where you can download them free of charge. If you know the correct properties and what to look for, this shouldn’t become a problem. The installation process will start automatically once you’ve downloaded the driver pack to your PC.
After taking the steps to apply the fixes listed above, always restart your computer and try to play an audio file. This will help determine which of the methods we suggested worked and will save you a lot of time before applying the next solution. We hope that this issue has been resolved for you in 2018 and that you will no longer have to troubleshoot your audio drivers manually.