“It’s an incredible feeling to know you’ve helped change the world for the better, even in a small way.
Do something that is greater than you.”
–James Fullerton
The graphics card is one of the most important PC components of a gamer. PC gamers have a huge number of options to boost up the performance of their games and also have the possibility to improve on their graphics cards. The most popular graphics card manufacturers such as NVIDIA, AMD, and Intel give gamers tools which can help tweak their game settings to make them work at maximum performance. Experienced PC gamers have no trouble tweaking their games for better performance, but if you are a newbie, you should probably let the graphics card do the work for you. In truth, learning to do this yourself will give the quality of graphics you want.
You must have noticed that when you install a new game, it automatically sets your graphics settings. Usually, they are set in different groups i.e. Low, Medium, High, and Ultra High. You may think that the game has chosen the best setting for you based on its assessment of your PC, but this is not the case. The game does not choose these settings depending on the hardware installed on your PC. It is just a group of settings the game is programmed to choose. Normally, you have to test your PC if it can run a game on any of the settings provided. On older games, you may want to run it on Ultra High settings while on newer, more demanding gamers, you may want to run it on low, or medium, or high settings, depending on the strength of various components of your PC. The autodetect feature of the game does not always function as it should. It may choose the wrong settings for the game if your computer’s hardware is more modern or manufactured after the game was produced.
Pro Tip: It is possible to fix many PC issues by using the PC Repair tool. PC Repair is easy to use and reliable Windows optimization software developed to fix hundreds of system issues.
Special offer. About Outbyte, uninstall instructions, EULA, Privacy Policy.
In this article, we are going to show you how to set graphics on pc games in Windows 10. The support software produced by popular graphics card manufacturers such as NVIDIA, AMD, and Intel are more intelligent. They consider a lot of other options which contribute to the smooth running of your game, such as the system’s GPU, CPU, Screen resolution, and compare them to the different hardware components which are present on test database. With this information provided, your game is able to set the settings which are recommended for the type of hardware installed on your PC. With the software provided by the graphics card manufacturers, you are able to choose between graphical fidelity and performance. This gives you the opportunity to place different games according to your personal tastes.
Now, let us get to the actual tweaking and optimizing process.
You will have to download software client for NVIDIA, AMD, and Intel, i.e. NVIDIA GeForce Experience, AMD Gaming Evolved, and Intel support client, depending on which of them is installed on your system.
- NVIDIA GeForce Experience
This NVIDIA control panel will help you boost the smoothness of your games and overall performance. You will see some FPS benefits from here, a smoother experience of pretty much every single game you are playing. We are going to make sure that you are running all the correct NVIDIA settings for you to get the best power delivery, GPU, Resolution, Refresh Rate, Color settings. - Right-click on any space on your desktop and click NVIDIA Control Panel from the drop-down list. If it is not accessible through the desktop, you can also check in your icon bar in the bottom right-hand side by right-clicking on the icon tray and select the NVIDIA logo found there. If it is not present in any of the places mentioned above and you are sure that you are using an NVIDIA graphics card, then you will have to update your drivers.
- Once the NVIDIA Control Panel is opened, navigate to the left-hand side of the window and click Adjust image settings with preview under the 3D Settings option.
- Select Use my preference emphasizing. Now, you can slide the bar towards Performance or Quality, depending on which soothes you best, then click Apply to save the change.
- Furthermore, select Use the advanced 3D image settings and press Apply.
- Now, go to Manage 3D settings on the left side of the window and select it. Here, move to the Global Settings tab and use settings provided below:
Ambient Occlusion Off
Anisotropic filtering Off
Antialiasing FXAA Off
Antialiasing – Gamma correction On
Antialiasing mode Off
CUDA – GPUs All
DSR – Factors Off
Multi-Frame Sampled AA Off
OpenGL rendering GPU Auto-select
Power management mode Prefer maximum performance
Preferred refresh rate Highest available
Shader Cache On
Texture filtering – Anisotropic sample optimization On
Please do bear in mind that switching off the antialiasing feature does not change the ability to run antialiasing within games, this is just for further optimization of the GPU. Also, some of the wording may be different from yours or you may not have all of the options provided above. Don’t worry, just follow along with the one in which you can.
Note that Maximum pre-rendered frames needs to be set depending on the hardware installed on your system. You have the possibility to choose between the number 1 to 4. 1 is going to be giving you the best response time and frame times. If you are running outdated hardware, you might find better results going with a higher number. If your GPU is extremely low and over 5 years old, you should go with either 2 or 3. If your GPU is very modern, we recommend you to stick with 1 because it will give you the best results.
- Now, navigate to Change resolution under the Display option. Make sure that your primary monitor is selected and set your Resolution and Refresh rate to the highest value
- Navigate to the Adjust desktop color setting under the Display option and select Use NVIDIA settings, then click Apply
- Again, select the Adjust video colour settings under the Video option and select With the NVIDIA settings and navigate to the Advanced tab and select Full (0-255) from the Dynamic range drop-down menu, then click Apply
AMD settings
The most important feature that you want to change is the graphics profile.
- First off, make sure you have the latest AMD drivers for your graphics card. Also, close the game and other unnecessary things that you have open.
- Now, you should be able to right-click on the desktop and select AMD Radeon settings from the drop-down menu
- From here it is very important to select CS:GO as the program you would like to customize and not Global settings. If you use Global settings, you risk screwing up the performance for other games you are playing.
- In the graphics profile of CS:GO you should change the antialiasing to Use Application settings, so that you can change the settings yourself in-game
- This next setting does not really matter anymore because of the previous change, but for now select Multisampling as the option for Antialiasing Method. It is the easiest option for your GPU
- Morphological filtering is another type of antialiasing; for best performance, select Off
- The anisotropic filtering mode is just like the NVIDIA feature, and we want this to be off as it might help against distracting details in the game
- Texture Filtering Quality changes texture quality to improve the game smoothness. Here, choose Performance
- Surface Format Optimization, this is an outdated feature and for CS:GO, it does not really do anything
- Wait for Vertical Refresh (Vsync): for CS:GO, it is very important that you set this to Off because you want little to no input delay possible
- OpenGL Triple Buffering is useless for the game, so you can turn it Off
- Shader Cache, just like NVIDIA, depends on what your C: driver is. If your C: drive is a fast drive like an SSD, you should turn Shader Cache on. Only turn if off if your Shader Cache is not an SSD or if you have a slow-performing drive. Note that Shader Cache can have a really good impact on CS:GO
- Tesselation Mode increases the in-game graphics by breaking larger polygons into smaller pieces. Select Use Application Settings for best performance
- Frame Rate Target Control is basically a frame rate limiter to make sure that your GPU isn’t overworking itself, so you really want this to be disabled for maximum performance
So these are the most important aspects of AMD Radeon profile settings for CS:GO
Intel graphics
- Normally, the first thing we need to do is to update all our drivers. Also, you need to update the Intel graphics control panel to the newer version. The best way of doing that is by going to the Intel website and downloading the Intel driver update utility. It is free software provided by Intel that works for all Windows operating systems
- Right-click on your desktop and select Intel HD Graphics Control Panel from the drop-down menu
- Select 3D settings, and choose Performance under the General setting option. Select Apply and then Yes to save the changes you made
- Go back to Home by clicking the Home button on the left top side of the window and click the Power option
- Under Graphics Power Plans, select Maximum Performance. Click Apply and then Yes to confirm changes you made
Now, to make sure that all your drivers are up to date, we recommend that you download and install Auslogics Driver Updater.
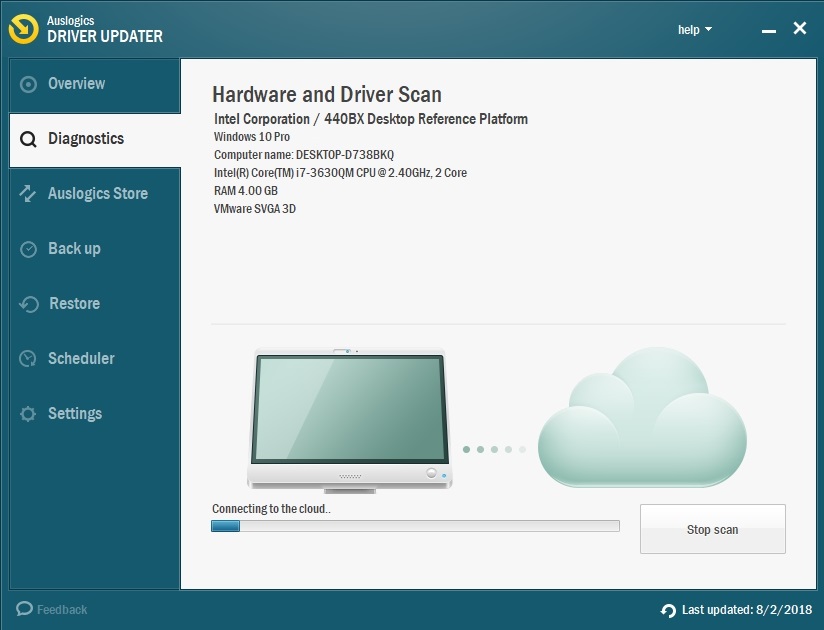
This tool will scan your computer for all missing and outdated drivers and download the latest manufacturer-recommended versions. It is very easy to use and you can download all your drivers with just one click.
We hope that this article has shown you how to set your PC games’ graphics settings. Share it with others who encounter similar issues.
We appreciate your ideas and comments.
We are ready to answer all your questions regarding the above topic.