“The Man Who Has Confidence In Himself Gains The Confidence Of Others.”
– Hasidic Proverb
Pro Tip: It is possible to fix many PC issues by using the PC Repair tool. PC Repair is easy to use and reliable Windows optimization software developed to fix hundreds of system issues.
Special offer. About Outbyte, uninstall instructions, EULA, Privacy Policy.
Using your computer without the right-click button is practically impossible. Except you know all the keyboard shortcuts which help to open context menus. This can greatly limit your Windows experience, and you won’t be able to perform simple tasks. This is because the mouse is the device which helps you to navigate through Windows, and if its functions are limited, then you will have trouble passing some commands. This could be very frustrating. I am sure your right-click is not working, that is why you are reading this article. You have come to the right place to seek for answers.
There could be several reasons why your right-click is not working. We have listed a few below:
- It could be problems with mouse hardware issue
- It could be that your system files are corrupted
- Third-party programs could also be a cause
- Incompatible, missing or corrupt drivers can also cause it
In the article, we will talk about the most of the problems that users have reported and how to solve them:
Right-click does not work on Windows 7/8/10 – even though this article is dedicated to fixing right-clicking problems on Windows 10, these issues can also arise on other Windows versions. Fortunately, the solutions provided here will work on all versions of Windows.
Right-click does not work in Microsoft Excel – right-clicking issues are experienced more in Excel than in other Office Suite programs. Many users reported that this led to serious limitations in the way they used the program.
Right-click does not work on Internet browser – this is also a common issue users witness when surfing the internet. You need to check for the updates of your internet browser. If this does not solve the problem, then you need to follow the instructions provided below.
Right-click does not work on Windows devices – this issue can occur on all of the devices listed, but it seems to be more common on laptops.
Now, we will talk about the solutions of the right-click problems:
Solution 1. Check the mouse
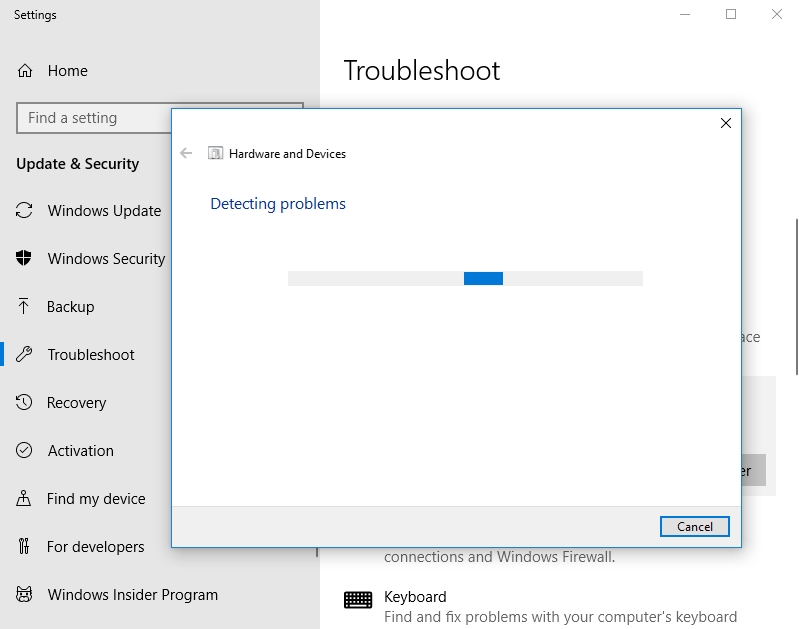
Normally, the first thing anyone will do is to check the if the mouse has any hardware issues or if it is bad. To do this, you need to plug your mouse into another computer and try if it works. You should also check the batteries if it is a wireless mouse. It is advisable to replace them with new ones. You can also troubleshoot hardware and devices to help with the problem on Windows 10:
- Click on the Start or Home button and select Settings icon from the pop-up menu.
- Click on Update and Security.
- Click on Troubleshoot.
- Click Hardware and Devices under the Find and fix other problems option and then select Run the troubleshooter.
- Windows will now find and fix any issues relating to the devices connected to your PC.
Solution 2. Turn off Table Mode
If you are having a device which supports full Windows mode and Tablet mode, then it will be advisable to switch to the full Windows mode and check if your right-click works there. This is because some devices do not support right-clicking in the Tablet mode. You can use the following steps to switch of Tablet mode on Windows 10: click on the message icon on the taskbar at the bottom right of your screen or just press Windows key + A on your keyboard to open the Action Center. Click on Tablet mode to switch it off. Now try to right-click again to see if it works.
Solution 3. Delete third-party shell extensions
Shell extensions can be added by third-party programs to the context menu. This means that some third-party shell extension can prevent the context menu from opening. So, the best course of action here is to delete the program with shell extensions.
Solution 4. Restart File Explorer
If you are having trouble with the right-click context menu in Windows Explorer, you will need to restart it to fix the problem. Sometimes, File explorer may not be responding, and that is why you are unable to right-click. You can restart it from Task Manager, using the following instructions:
- Press Ctrl + Shift + Esc on the keyboard to open the Task Manager.
- Navigate to the Processes tab and select Windows Explorer.
- Now, click the Restart button
Solution 5. Make sure that the Group Policy’s Remove Windows Explorer’s default context menu setting is not active
Note that if this option is active, you won’t be able to access your context menu. This issue usually arises on Windows 10 Enterprise or Pro which have the Local Group Policy Editor. To check that this option is not active, use the following instructions:
- Press the Windows key + R on your keyboard to open the Run dialog box.
- Type gpedit.msc in the search box and press Enter to open the Local Group Policy Editor window.
- Navigate to User Configuration > Administrative Templates > Windows Components > File Explorer.
- Open the Remove Windows Explorer’s default context menu.
- If the option is active, then you need to deactivate it.
- Confirm the changes and check if the problem has been resolved.
Solution 6. Update your mouse driver
Outdated mouse drivers can cause your mouse to malfunction or not function properly. So, the most logical solution is to update the mouse driver, using the following steps:
- Click on the Start or Home button and type device manager in the search box.
- Select Device Manager from the list of option. This will open the Device Manager Panel.
- Double-click on Mice and other pointing devices to view the list of devices installed on your computer.
- Double-click your mouse to view its properties. Usually, there will be a yellow exclamation mark beside it if the driver needs updating.
- Navigate to the Driver tab and select Update Driver.
- In the next window, choose the Search automatically for updated driver software option.
- Windows will now download the latest version of your driver.
Alternatively, you can download and install Auslogics Driver Updater. It will save you a lot of time. This tool scans your computer for missing and outdated drivers and installs the manufacturer-recommended versions. You will be able to download all your drivers in just one click.
Solution 7. Run the System File Checker
This Windows tool helps to check for corrupted system files. These may be the cause of why your mouse is not functioning properly. So, it is advisable to fix these corrupt files and check if your problem has been solved. Here is how to do it:
- Press the Windows key + X on the keyboard and select Command Prompt (Admin) from the pop-up menu.
- Type scf /scannow in the Command Prompt dialog box and press Enter.
- Now, it will find and fix any corrupted file on your system. This process usually takes some time depending on the specifications of your computer.
- Restart your PC and check if your problem is solved.
Solution 8. Restore Windows to an earlier date
There is a built-in tool which is capable of restoring your computer to an earlier date in time. With this process, your files and folders will not be changed. Only the settings and changes that have occurred in the operating system will be rolled back. This is a very important tool because sometimes our computer can run into errors that we do not know the cause of or cannot fix. So, we just restore to a point before the error occurred. This can be applied in this case to fix the right-click problem. Note that this method can only be used if we have created restore points before. Sometimes, Windows creates restore points when important changes want to occur in our system. Restore your computer, using the steps provided below:
- Click on the Start or Home button and type “system restore” in the search box.
- Select Create a restore point from the list of available options.
- This will open the System Properties window.
- Select System Restore and click Next.
- Now, you will see the list of restore points available. Check the Show more restore points box to view more restore points.
- Choose the date you want to restore to and click Next.
- Click Finish when you are done to restore Windows.
Solution 9. Disable touchpad or change the touchpad delay time
Sometimes, the external mouse and your touchpad may be conflicting. So, it is advisable to disable one. Here is how to change touchpad delay time:
- Press the Windows key + I on your keyboard to open System Settings.
- Click on Devices and select Mouse and touchpad.
- You can change the delay time under the Touchpad option until you find fix to your problem.
You can also disable touchpad if the above process did not help. Do this, using the following steps:
- Open the Start menu and type Mouse settings in the search box.
- Select mouse settings from the list. This will open the Mouse Properties window.
- Navigate to the Touchpad tab and disable it.
- You can try to right-click to check if this has resolved the problem.
Solution 10. Look for third-party program conflicts
If you have installed any programs to tweak your pointing device, then it is time to uninstall them. This could be the reason you are experiencing the right-click problem. Use the following steps to uninstall the program:
- Click on the Start or Home button and type control panel in the search box.
- Select Control panel from the list of available options. This will open the Control Panel window.
- Go to Uninstall a program.
- Select the program you installed to tweak your pointing device and select Uninstall.
- Restart your computer and check if your right-click is working properly.
Note that you can also remove any newly installed third-party programs if this problem started when you installed them. This is the best course of action. To do this, you just need to follow the same steps and above, but choose the program you want to uninstall and uninstall it.
Solution 11. Update your NVIDIA drivers
Outdated NVIDIA drivers have been linked with problems with right-clicking, especially when you install the latest Windows 10 Creators Update. To fix this, update your Motherboard drivers, especially the NVIDIA drivers. You can download and install these drivers from the manufacturer’s website or use Auslogics Driver Updater.
Solution 12. Adjust your power management settings for USB
Many users have reported that the right-click issue was fixed when they adjusted the power management settings of the USB Root Hub. Use these steps to change them:
- Press the Windows Key + X on the keyboard and select Device Manager from the pop-up menu.
- Double-click on Universal Serial Bus controllers to view the list of USB devices connected to your computer.
- Now, double-click on USB Root Hub to open its properties.
- Navigate to the Power Management tab and uncheck Allow the computer to turn off this device to save power box.
- Click Apply and OK to confirm your changes.
- You need to repeat these steps for all the USB Root Hub devices present in Device manager.
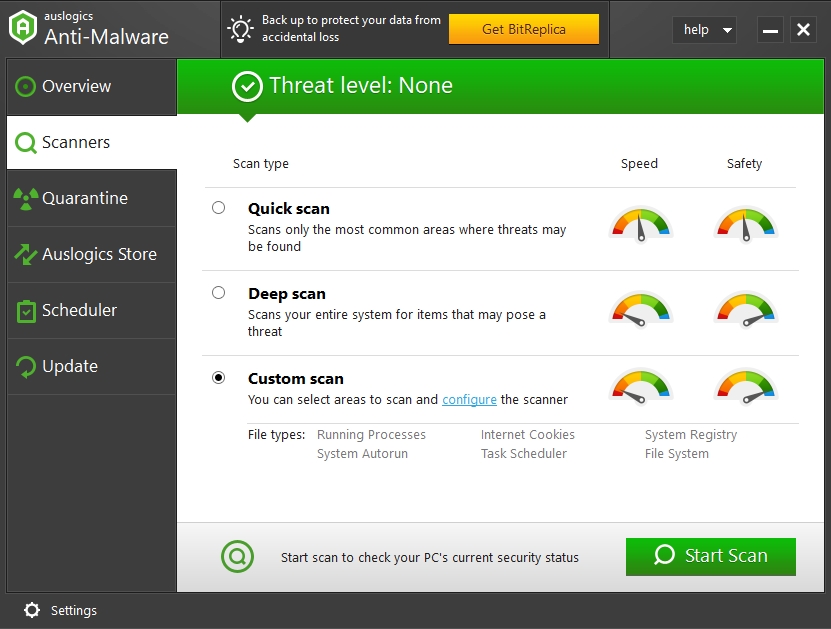
Solution 13. Perform a full system scan
You should never rule out the effect of viruses on your computer because they can manifest in different ways. Usually, they cause hardware and devices to malfunction, and that could be true in this case. Also, if you can’t install anti-virus on Windows 10 or Windows 10 stops anti-virus, then you should suspect viruses. They may be causing the mouse to malfunction. Usually, we recommend users to download and install the Auslogics Anti-Malware tool to augment the effect of Windows Defender, which is the Windows 10 default antivirus. Once you have installed the anti-virus, you need to perform a full system scan to remove any threat present in your system which may be causing you to have trouble with right-clicking.
Solution 14. Update your operating system
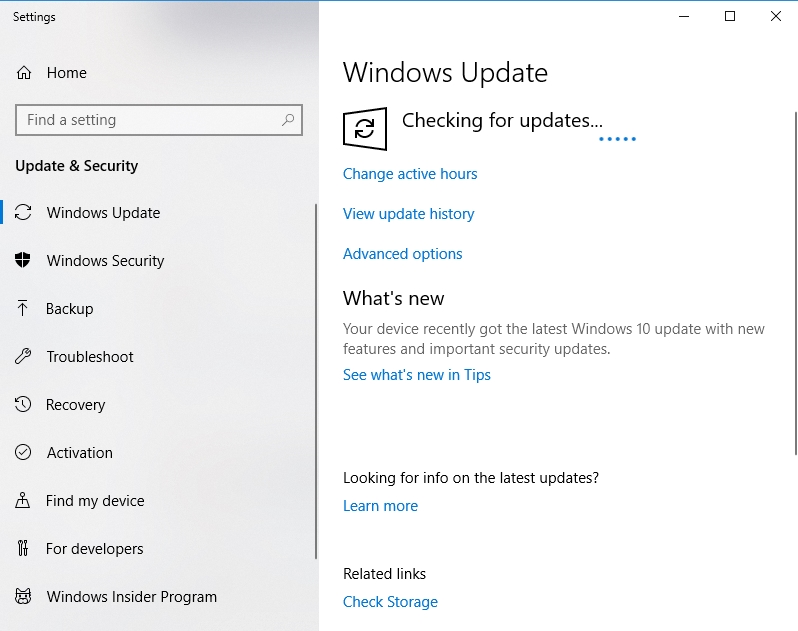
Updating your operating system can also help with this issue. Microsoft releases these updates to fix and improve the features of the Windows operating system. That is why we advise you to install the latest updates and check if your problem has been solved. Here is how to do it:
- Press the Windows key + I on your keyboard to open the System Settings
- Click on Update and Security
- Now, select Windows Update
- Click Check for updates
- Windows will now search and download available updates for your computer.

- Restart your computer and check if the problem has been resolved
We hope that this article has solved your right-click issue. Share it with others who encounter similar problems.
We appreciate your ideas and comments.
We are ready to answer all your questions regarding the above topic.