“Success seems to be connected with action. Successful people keep moving.
They make mistakes, but they don’t quit.”
Conrad Hilton
Pro Tip: It is possible to fix many PC issues by using the PC Repair tool. PC Repair is easy to use and reliable Windows optimization software developed to fix hundreds of system issues.
Special offer. About Outbyte, uninstall instructions, EULA, Privacy Policy.
A blue screen of death (BSOD) is a common operating system error
When users get this problem for the first time, they are very worried that their computer has seriously malfunctioned. This is because the computer restarts immediately after it displays a BSOD. Let me assure you that it is not as big an issue as it seems, and we are here to help you find the root of the error and solve it. You will not encounter a BSOD again in the future, and even if you do, you will be able to solve it without much difficulty.
There are many different types of BSOD errors, but today we are going to be talking about a specific one: the VIDEO DXGKRNL FATAL ERROR or the error code 0x00000113. When a blue screen of death occurs, it is important to read the information or text written on it. This is because this information will give us clues and hints on how to solve the problem.
In this article, we will teach you how to fix the VIDEO DXGKRNL FATAL ERROR in Windows 10, but first, we need to know what this error is and what causes it. The VIDEO DXGKRNL FATAL ERROR or the error code 0x00000113 is a signal which notifies violations in the DirectX graphics kernel system. Most users reported that they encountered this problem when upgrading from Windows 8 or previous versions to Windows 10.
This error can be caused by any of the following factors:
- Malware infection which corrupts system files.
- Incompatible, outdated or incorrect drivers for your video card.
- Driver crashes or conflicts which are caused by damage or newly installed hardware.
Now I will give you solutions to fix the VIDEO DXGKRNL FATAL ERROR.
Solution 1.
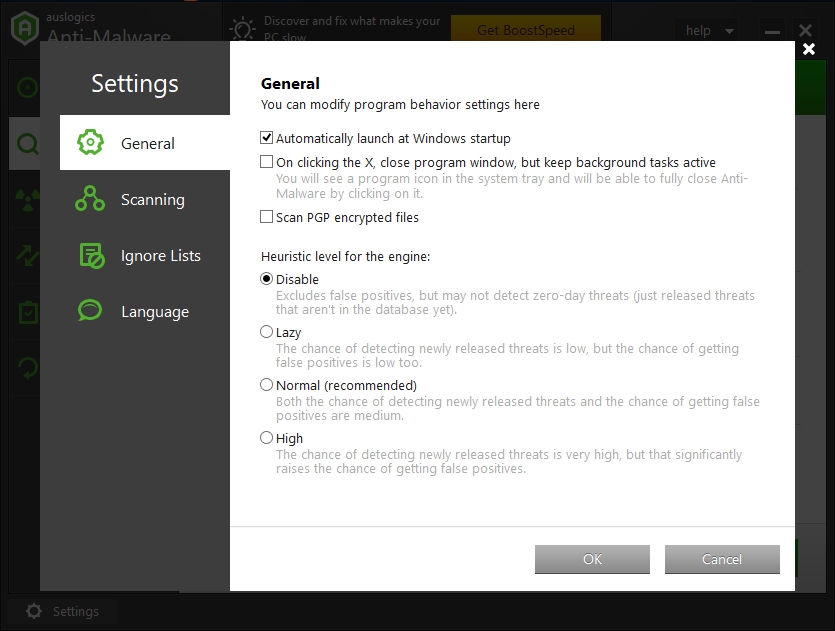
Conduct a scan for viruses or malware on your computer. You can do this by downloading and installing the Auslogics Anti-Malware tool. It checks your system memory for infected programs and deletes them. It also scans your system and temporary folders for security problems. If there is any suspicious entry in the registry, it is analyzed by the tool in question. I recommend you download and install Auslogics Anti-Malware to prevent your computer from running into issues like this.
Alternatively, if you know the exact location of the files infected with malware, you can enter safe mode and delete them to fix the VIDEO DXGKRNL FATAL ERROR. With this method, you need to be cautious not to delete other files which are vital for the smooth functioning of your computer.
Solution 2. Repair bad system files.
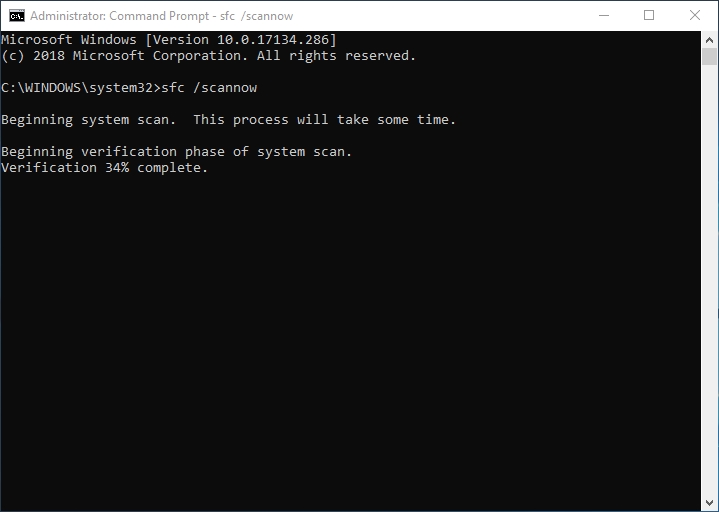
- In the Start menu search box, type cmd. Right-click on cmd in the Start menu and select Run as administrator.
- Copy and paste sfc /scannow in the command prompt window and hit Enter.
- It will now check all your system files to make sure that they do not have any issues, and if they have problems, it will automatically fix them.
If the message “Windows Resource Protection found corrupt files but was unable to fix some of them” appears on your screen , then restart your computer in safe mode and do step 1 and 2 again to repair the corrupted system files.
Solution 3. Perform a clean boot into your computer.
You can diagnose services or startups that cause the VIDEO DXGKRNL FATAL ERROR with the help of Windows 10 clean boot. Performing a clean boot helps you to determine which of your driver or program is causing the problems so that you can find a solution to it.
- Press the windows key + R on the keyboard or right-click the Start or Home menu and select Run.
- Type msconfig into the Run search box and press Enter.
- Go to the General tab in the System Configuration box. Select Selective Startup and uncheck the Load startup items check box.
- Go to the Services tab. Check the Hide all Microsoft services and then click Disable all.
- Click OK and then select Restart in the new dialog box.
The next steps will help to diagnose if there are still errors in the services after the Windows 10 clean boot.
- Press the windows key + R on the keyboard or right-click the Start or Home menu and select Run.
- Type msconfig into the Run search box and press Enter.
- Go to the General tab in the System Configuration box. Select Selective Startup and uncheck the Load startup items check box.
- Go to the Services tab and check the Hide all Microsoft services. Enable just the first half of the services and disable the rest.
- Click OK and then select Restart in the new dialog box.
- If no problems were identified in the first half of the services, check the remaining half of the services with the same steps.
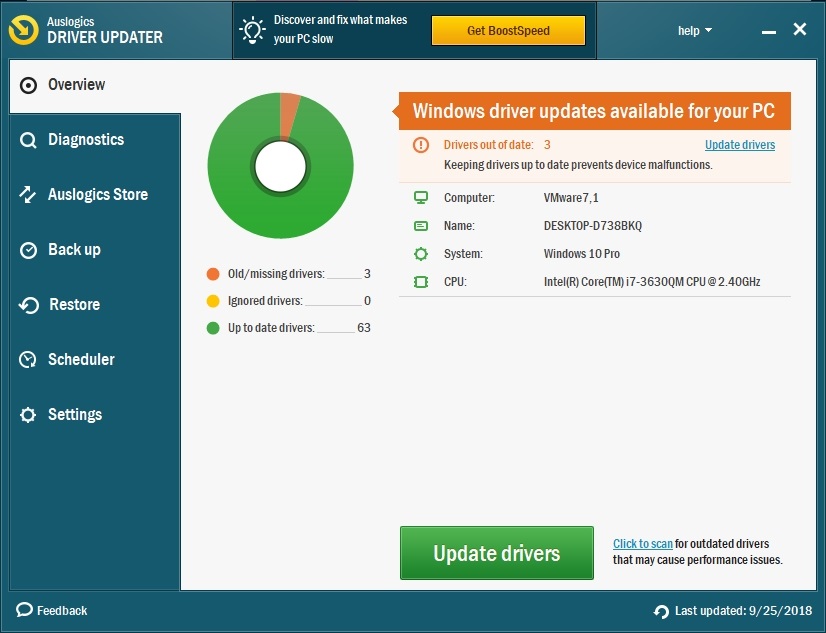
Solution 4. Update the graphics driver.
Download and install Auslogics Driver Updater to find out which of your drivers are outdated, corrupt, damaged, or missing. It will automatically repair or update them. It will also search for the latest drivers which are compatible with your devices.
Also, you can manually search for a driver online and download the latest version of it from the manufacturer’s website. This is to make sure that you have the compatible driver for your device.
Alternatively, use the following steps:
- In the Start menu search box, type device manager.
- Now open Device manager and scroll down to Display adapters
- Double-click on Display adapters to reveal your graphics card driver.
- Right-click on the driver and select Update Driver.

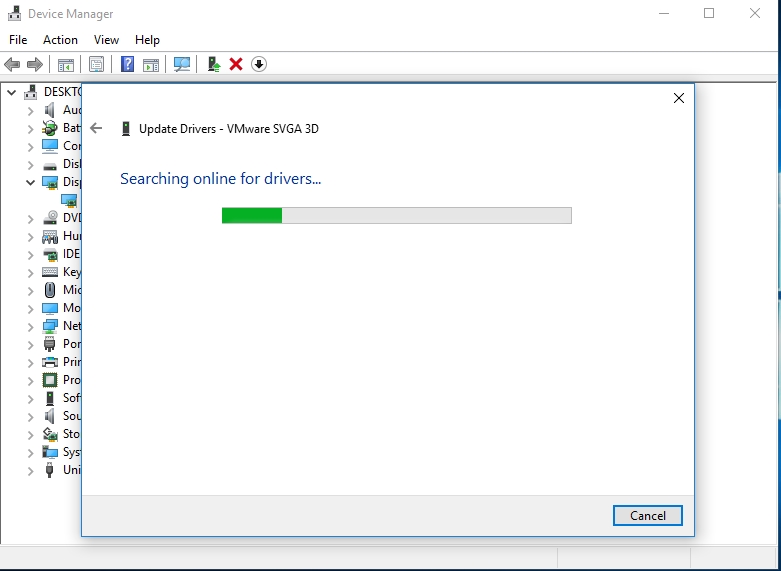
This will automatically search for your drivers online and download and install them.
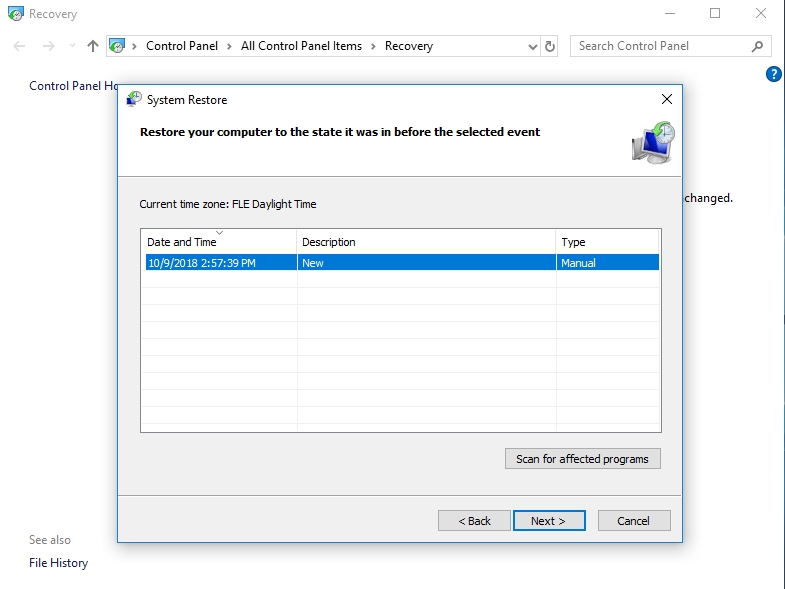
Solution 5. System Restore.
System Restore can return your PC to its normal state. Your data will not be affected – it will only remove the programs installed after the restore point was made. You can restore the system to remove conflicting programs which are the cause of the VIDEO_DXGKRNL_FATAL_ERROR blue screen.
Note that the method will be possible only if you have created a restore point before. Sometimes your computer creates restore points automatically after you installed certain programs.
- Click on the Start or Home button, type Control panel in the search box and press Enter.
- In the Control panel search box, type Recovery.
- Select Recovery in the available options.
- Click on Open System Restore.
- You will now choose your Restore point, and Windows will guide you through the recovery process.
Another method to do this is from the Advanced startup menu.
- Click on Start or Home button and select Settings.
- Go to Update and Security.
- Click on the Recovery option.
- Under the Advanced startup option select Restart Now.
- Your computer will now restart and display a Choose an option menu.
- Click on Troubleshoot.
- In the next menu, select Advanced options, then choose System Restore.
Windows will now guide you through the restore process.
We hope that this article has helped you solve the VIDEO DXGKRNL FATAL ERROR. Share this article with other users who encounter similar problems.
If you have any questions or comments on this issue, feel free to express them.
We are always ready to clarify any of your doubts and welcome new ideas.