Windows 10 since its release has been a delight for most PC gamers. Microsoft launched its latest operating system with a pleasing interface and some gaming enhanced features like streaming, recording, and even the inclusion of the Xbox one app.
Windows 10 supports all forms of games and their builds, and the applications built to work online majorly or the games played through programs like Steam or Origin (mostly for EA games) have become hugely popular.
Steam is the gaming or distribution platform for several titles. It manages the installation and use of games across multiple computers. Of all services offered by Steam, gamers have identified multiplayer gaming, video streaming, and social network services as activities they enjoy most on the platform.
Pro Tip: It is possible to fix many PC issues by using the PC Repair tool. PC Repair is easy to use and reliable Windows optimization software developed to fix hundreds of system issues.
Special offer. About Outbyte, uninstall instructions, EULA, Privacy Policy.
Nevertheless, there are downsides to the use of Steam as humans are yet to develop a perfect application. Then again, the Steam program releases are very stable when compared to an average game or app. Regardless issues like crashes, Steam not opening correctly or closing immediately after launching still occurs given specific configurations or when the necessary conditions are met in an operating system environment.
Even if we rule out all the issues that have to do with the opening of the Steam application itself, we do know of other problems that can disturb you severely.
These days when users want to play a game, they open the Steam application and locate the game they intend to enjoy. So what do you do when your games are refusing to launch or open in Steam?
If you are here to get help on solving this problem, you should rest easy from this moment because you have come to the right place.
How to fix steam games not launching in Windows 10?
Through intense research coupled with the knowledge obtained from several user reports, we have gathered almost every effective fix in the list below. If you cannot use a particular solution or you tried a fix, and it failed to work for you, feel free to move on to another:
Check Windows updates:
The operation involved in the first fix is something that Microsoft recommends you regularly do to keep your system healthy. When you update your system, you get bug fixes and patches for a wide range of problems. There is a good chance that the issues you are experiencing do not occur on an updated build of your operating system.
To find out if your system has the latest Windows updates, follow these instructions:
- Click on the Windows start icon. Select Settings from the list of programs or options available
- Click on Update and security
- Select Windows updates
- Click on the Check for updates button. Windows should now connect to Microsoft servers to fetch the available updates. If your system possesses the latest updates, then Windows will inform about this. Otherwise, you will see the updates accessible to you. Download and install the updates as appropriate. Restart your system and see if anything changes

On the other hand, if your problems only came to be after Windows downloaded and installed specific updates, then a reversal of the process might be what you need instead. For all the good that Windows updates provide, they sometimes come with their problems. For example, the Windows 10 Fall Creators Update caused a lot of trouble on some computers.
Follow these instructions to roll back updates or revert to an old version or build:
- Click on the Windows start icon and open the Settings app as usu
 al
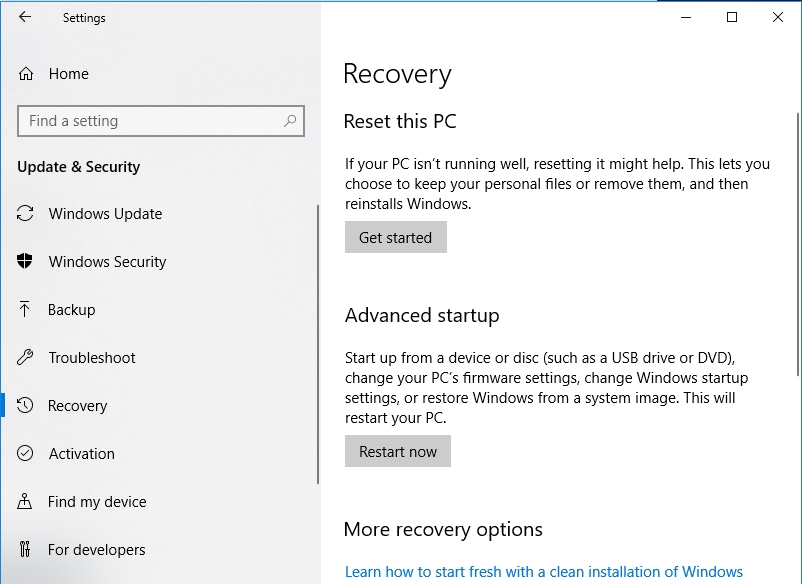
al - Select Update and security. Click on Recovery this time
- Under Go back to an earlier build, click on the Get started button
- Now you will have to indicate the reason for returning to an earlier build. After doing this, click on Next
- Now Windows will show you the latest updates available for download. Click on No, thanks. Select Next to continue
- Click on Next once more and select Go back to the earlier build. Follow any displayed instructions as appropriate and wait for the completion of the process
- Allow your system to restart and check if this action helped to resolve your problems
 al
alNote that you can perform this process of reverting to an earlier version of Windows only on iterations of Windows 10 older than the Fall Creator Update. Microsoft deleted the option from this update and subsequent ones for unknown reasons.
Update your device drivers:
Drivers are integral in every single operation or interaction involving hardware and software. When corrupted, outdated or missing driver software is the cause of a gaming-related problem, the drivers most likely to be affected are the graphics drivers for obvious reasons.
Apparently, you can solve this problem by just updating your graphics drivers. Carrying out this operation is easier said than done though. But with the help of an excellent program, you can make easy work of the entire process.
- Download and install Auslogics Driver Updater to upgrade your graphics card drivers (or even all drivers for your PC) in the most efficient and risk-free way process. This excellent program would perform a thorough scan to identify the drivers that require upgrades and quickly let you update them to the latest and trusted versions available.
- If you prefer to get your hands dirty, then you are likely to try to update your drivers manually. Here, you by yourself must execute all the necessary operations: Identify the missing, outdated or corrupted driver software; Search for the required drivers; Download and install the items you found.

You will do well remember that you must obtain drivers from trusted sources only. Also, ensure that you download only the latest, correct, and recommended versions of each driver to avoid stories that touch.
After updating the required drivers, restart your system to let the new drivers take charge and check if your games now launch properly.
Eliminate conflicts and restart the Steam app:
The first action we recommend you carry out involves the closure of all unnecessary running programs. Some programs currently running on your Windows 10 device are capable of interfering with the operations of Steam and games that depend on it. Here is an almost comprehensive list of such programs:
- Anti-virus Software
- Virtual Private Network (VPN) Software
- Anti-Spyware Software Firewalls & Security Applications
- Peer-to-Peer (P2P) Clients & File Sharing Software
- FTP and Web Server Applications
- IP Filtering/Blocking Programs
- Download Accelerator and Download Manager Programs
We recommend that you stop using these applications, disable or even uninstall them if possible. After doing this, you might need to restart your system for the new changes to take effect.
You can also restart the Steam application by following the steps below:
- Close all open windows and exit every app that can disturb Steam or its operations
- Right-click on the Windows start icon. Select Task Manager from the list of programs and options available
- Click on More details if your Task Manager window is the one with limited view and options
- Go to Details and select the Steam.exe process
- Stop this process by clicking on End Task
- Exit Task Manager and restart Steam. Check if things work differently now
Correct your Time settings:
Steam is a dynamic application that works with real-time data on your PC. An incorrect time or time zone affects its operations and might be the reason your games cannot open properly. If you have just upgraded to Windows 10 or installed the latest Windows updates, then there is a high chance that the recently concluded process tampered with your settings.
Get things in order by following these instructions:
- Right-click on the Windows start icon to see some essential programs or options. Select Control Panel from this list
- Once the required window opens, navigate to the settings for Date and Time. If you cannot find what the required option, input date and time into the available text box to search for it
- Once the Date and Time window opens, navigate to the tab for Internet Time. Click on Change Settings
- Tick the checkbox for Synchronize with Internet time server. Click on Update now
- After Windows updates the time successfully, click on OK
- Exit all open windows and launch Steam. Check if you can open your games now
Verify the integrity of the game cache:
This fix is the recommended move for cases in which a corrupted game cache (or its invalid content) is what is preventing your games from opening correctly. The verification or check involved here is also useful in scenarios that have to do with game crashes or their inability to run at all.
Here are the instructions for carrying out the necessary process:
- Open the Steam application by clicking on its icon or shortcut on your desktop screen
- Once the program window opens, navigate to Library. Select Properties from the menu
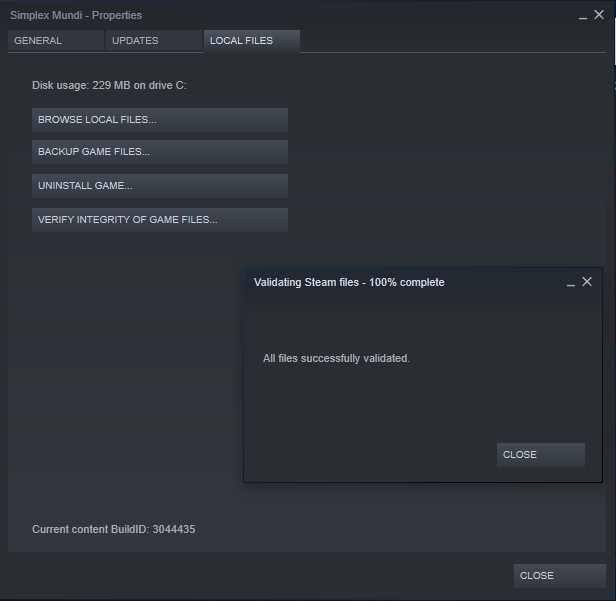
- Navigate to the Local files tab. Click on the Verify integrity of game files button. The validation of Steam files should begin now
- Wait for the completion of the process. You should see a message stating “All files successfully validated”
- Now try to relaunch the affected game
Run the game as administrator:
This action provides the game with extra privileges or administrative powers that might propel it to open. Do this:
- Open Steam. Go to its Library
- Locate the game with which you are experiencing problems. Right-click on it and select Properties
- Navigate to the Local Files tab
- Click on Browse Local Files. You should be taken to a particular file or folder location now
- Find the game executable file (which usually ends with .exe extension). Right-click on this file and select Properties. This action should cause a new window to pop up
- Move to the Compatibility tab by clicking on it. Now tick the checkbox for Run this program as administrator
- Click on OK to save the changes you have just made
- Exit all open windows. Try to open the game once more and see if you are successful this time
Run the game in Windowed mode:
Although we still do not understand how this option works to solve the problem of games not opening, we cannot help but include it because too many users have confirmed that it worked flawlessly to fix their issues.
Here are the instructions you need:
- Open the Steam application; you have done this several times already
- Go to your Library and located the affected game. Right-click on it and select Properties
- Navigate to the General tab. Click on Set launch options and input /windowed
- Save what you entered by clicking on OK
Now try to launch the game and see if it opens this time
Run the game in compatibility mode:
When a game refuses to launch because its components are incompatible with a specific operating system environment, you must run that game in compatibility mode for a different environment to get through the problem. Follow these steps carefully:
- Click on File Explorer or its icon to open it. Navigate to your Steam directory (folder for the majority of Steam-related data). The default location of this folder on most systems is C:\Program Files (x86)\Steam. You can hold and press the Windows button, then hit the letter R key to launch the Run app. Input this folder link into the available text box. If you remember installing Steam in a different directory, then go to that location instead
- Once you are at right place, you should see the folder SteamApps. Click on this folder to open its contents. Locate the folder Common
- Now you should see the list of games installed on your PC. Find the affected game and right-click on it. Click on Properties
- A new window should pop up now. Navigate to the Compatibility tab and tick the checkbox for Run this game in compatibility mode for
- In the drop box below, select Windows 8 from the list of Windows operating system versions available
- Click on Apply. Click on OK to save the changes you just executed
- Exit all open windows and ensure that your Steam application or client is closed. Reopen the Steam program. Try to launch your game as usual and see if you are successful this time
Remove a specific file:
Users have identified the Steam file ClientRegistry.blob as the one that is usually damaged or corrupted, which results in games failing to launch or open. In most scenarios, the Steam client crashes repeatedly, and it becomes impossible to play games.
ClientRegistry.blob is a binary or cache file used to store configuration, user preferences, and other settings. The removal of this file is a relatively harmless move that might solve the problem of Steam games not launching on Windows 10:
- First, ensure that the Steam application or its client is not running currently
- Open File Explorer and go to the Steam directory. On most systems, by default, you can get there by navigating through the following folders: C:Program Files (x86)Steam
- Now you should see the ClientRegistry.blob file. Make a copy of this file and store it somewhere safe
- Delete the file
- Now reopen the Steam application. You might see an update message. Now try to launch your game as usual
Clear the cache:
The cache sometimes contains corrupted or unwanted files that somehow affect the opening of Steam games. In case you are wondering, most of the data provided in these files are not extremely critical, so you can delete them quickly without your action being tainted by the consequences that follow the removal of essential data.
Here the steps to follow:
- Open the Steam application or client. From the top left area of your window, click on Steam and select Settings
- Under the Settings panel, navigate to the Downloads tab
- Look down and click on the Clear Download Cache button located at the bottom of your current window
- Click on OK to confirm your action and acknowledge that you will have to log into Steam again
- Log in as expected. Check if your games now open properly
If the process above failed to work or you could not use the instructions provided, follow these steps to clear the appcache instead:
- First, you must go to your Steam directory. Press and hold the Windows button, then hit the letter R key to launch the Run app. Input C:\Program Files (x86)\Steam into the available text box and press the enter key. This action results in a File Explorer window opening and showing you the location of Steam files
- On the top of the list of folders, you should see appcache. Make a backup of this folder and store it in a safe place (copy and paste the folder into an easily accessible directory like your desktop)
- Delete this folder and exit File Explorer
- Launch the Steam app but this time right-click on its icon or launcher and select Run as administrator. In theory, Steam should detect that some files are missing and start downloading them
- Once all is done, try to open your game and see what happens this time
Relocate the Steam application:
This procedure helps in dealing with a wide variety of errors and crashes. Some users were able to launch their games successfully after changing the location of their Steam data.
Here are the things you need to do:
- First, you must create or locate the new directory you intend to use. Open the Steam application or its client
- Once the required window opens, Select Settings. Click on Downloads and select Steam Library Folders
- Click on Add Library Folder. Choose a new path or location for Steam. This new directory would define the road for all future installations that you might carry out
- The next step involves you moving already existing Steam files to enable them correspond to the new path you have just selected. Close the Steam program or all its open windows
- Launch the File Explorer program. Navigate to the original location for Steam files. Recall the folder destination when you installed Steam. By default, on most systems, you can get there by navigating through the following folders: C: \Program Files \Steam
- Delete every file and folder you see in your current location and leave only the SteamApp, UserData folders, and executable files (items that end with .exe)
- Now move all the folders to the new path you selected earlier (cut and paste)
- Finally, reopen the Steam application. Log in as usual and try to open the affected game
There is always the possibility that some users might experience strange difficulties while attempting to move the Steam folder or after the launch of the Steam application. We took this into account and provided further instructions to ensure everything goes smoothly:
- Exit the Steam application and ensure that no application related to it is currently running
- Open File Explorer. Navigate to your new location for Steam data
- Move the SteamApps folder that you find there to your desktop screen
- Now uninstall Steam. This process brings about the removal of the currently saved Steam settings on your PC
- Once the uninstallation is complete, reinstall the Steam application in the new location you chose earlier
- Relocate the SteamApps folder (currently on your desktop) to the new Steam directory. The operation you have just executed is for the transfer of your game data or content, settings, and so on
- Now reopen the Steam app. Enter your details to log in as usual
- Verify the integrity of the Steam game files. We provided instructions on performing this operation earlier in this article
- Finally, check if your actions have had an effect on the issue of your games failing to open
We did not expect you to get to the end of this article. Regardless, we have included further fixes or solutions for the select group of users who might still be struggling with the problem of their games not opening in Steam.
- Reinstall Microsoft Visual C++ redistributable or its components
- Reinstall DirectX. The latest version is DirectX 12, and it is supported on Windows 10 only
- Disable the Steam Cloud Synchronization
- Uninstall the games and download fresh copies or the latest versions. Most users might realize that this is a long or tedious process to carry out. Only do this if you do not mind.
- Turn off Steam overlay
- Disable programs that are recording or capturing your screen in the background.