Google Chrome is the long-reigning leader in popularity among other browsers. And while its convenience and timely new additions continue to enhance the users’ digital experience, it doesn’t mean that this browser is completely devoid of shortcomings. One of the most annoying problems with Chrome is the Kill page error, and it continues to haunt Windows 10 users.
The Kill page message will appear in Google Chrome, and some users use a variety of ways to describe the problem when they are searching for troubleshooting options.
Google Chrome keeps killing my pages – sounds like a bloodbath. In reality, the windows that are open will unexpectedly crash when Chrome is running. This should not happen unless your computer was infected with a virus or is suffering from some severe file corruption.
Pro Tip: It is possible to fix many PC issues by using the PC Repair tool. PC Repair is easy to use and reliable Windows optimization software developed to fix hundreds of system issues.
Special offer. About Outbyte, uninstall instructions, EULA, Privacy Policy.
Chrome unresponsive kill pages hangs loading – the ‘hanging’ refers to ‘frozen’ pages that you cannot access any other way other than Chrome. To make sure, you might want to use another browser, but first, read this guide to know all the possible options and outcomes. It is possible that your browser has fallen victim to some extensions running in background mode.
Chrome unresponsive kill pages – is another way of describing the same issue. It’s a sign that you need to perform some serious maintenance of this error, or it will lead to the system’s crash. So, take action immediately.
The issue you are experiencing with Chrome can be a sign of some significant internal damage to your computer. Before trying any kind of troubleshooting, however, check the less obvious but nonetheless essential parts of your internet experience: your connection, for example.
We take for granted that the Wi-Fi hotspot will always give us the internet access that we need. However, one must always entertain the possibility of poor connectivity causing issues with the browser. Case in point: certain website scripts have loading issues when the connection is slow. This could be making your page unresponsive. After a while, the Kill page will appear because the browser ran out of options (or patience).
Another important issue to consider is your computer’s customized configuration. Google Chrome is a browser that is resource-intensive, so you must limit the number of open tabs in order not to overwork the loading process. We advise taking the Bookmarks tab seriously and use it for all important tabs. Cataloguing your tabs can be fun if you set your mind to it.
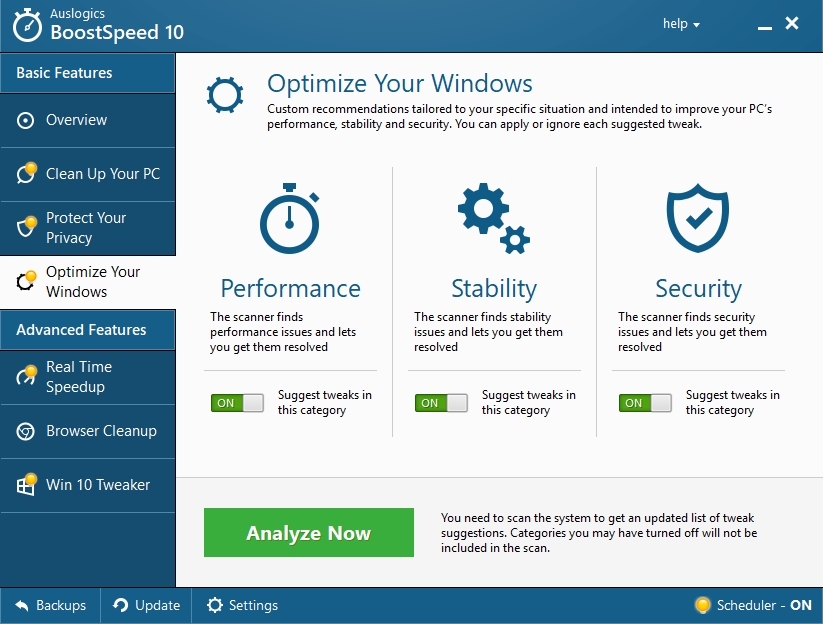
If you already know that the Kill pages appear because you are using your browser extensively and it’s not living up to its full potential, we advise using Auslogics BoostSpeed, a tool that will significantly enhance your computer’s performance based on the custom setting you set it to. So, if you are experiencing issues with loading pages in Chrome due to background running programs, it only makes sense to optimize the speed of your computer.
How to fix Google Chrome Kill pages error on Windows 10?
Other than some less than obvious solutions stated above, we have prepared a list of fixes that can help you resolve the Chrome Kill page error.
Solution 1. Switch off Sandbox mode.
Sandbox mode protects your browser from malware. It is not advisable to turn it off unless absolutely necessary. And in your case, you need to rule out all possible issues with your browser before bringing out the big guns. In other words, switch off this Sandbox mode because it can be using up too much of your computer’s resources and cause Kill pages to appear. To do that, follow this easy guide:
- Step 1. Right-Click on the Google Chrome icon and choose Properties.
- Step 2. Find the Target field in the Shortcut tab and add -no-sandbox. Your target field should look like this: “C:\Program Files\Google\Chrome\Application\chrome.exe” –no-sandbox.

- Step 3. Click Apply and Ok. The Kill page should not appear anymore.

Solution 2. Clean third-party cookies.
Even though cookies add to the speed and overall performance of your browsing experience, they can also significantly harm your computer if they are not regularly cleaned and maintained properly. Some third-party cookies also hold a threat of passing along some malicious software, so disable them for a while until you figure out what else could be causing the Kill pages. Follow these instructions:
- Step 1. Open Google Chrome and enter: chrome://settings/content
- Step 2. Enter the Cookies sections
- Step 3. Enable the option to block third-party cookies and site data.

Solution 3. Clean the Cache folder.
Google Chrome will store the cache until it is set to do otherwise, so you might want to look into that folder and delete some unwanted files, as they may be causing the Kill pages. You can also rename the folder to see if it was the culprit indeed.
- Step 1. Use the Win key + R shortcut and enter %localappdata%, hit Enter.
- Step 2. Go to the Google\Chrome\User Data\ folder.
- Step 3. Find the Default folder. This is when Chrome stored the cache.
- Step 4. Delete the folder or rename it to Default Backup.
- Step 5. Close the folder and restart Chrome. See if the problem continues to present itself.
Solution 4. Switch off extensions.
Unwanted extensions can be using up your computer’s memory and causing the Kill pages to appear in Chrome. Check the list and maybe switch off a few.
- Step 1. Click on the Menu tool and scroll down to More Tools>Extensions
- Step 2. In the list, decide which ones you don’t need.
- Step 3. Locate the extensions that you don’t use and delete them.
- Step 4. Remember to confirm the removal of the extension.
- Step 5. Restart Chrome. If the problem was in the extensions overuse, you have now fixed it.
Solution 5. Customize your settings or use a special tool.
You can amp up your High Performance profile or disable hardware acceleration, but in the process, you will be tweaking settings that have worked well for your computer for a long time. Instead, we suggest using Auslogics BoostSpeed to do that for you. Centering the issue at hand, it will re-evaluate the resources that your computer uses for daily tasks and give the energy from the ones your hardly use to the ones you actually use.
Solution 6. Reinstall Chrome.
If you are still having issues with Chrome, you should consider reinstalling the application altogether. To remove it, you need to open the Settings app and go to System>Apps and Features. Locate the app on the list and uninstall. After you have removed Chrome, go to Google’s website and download the new version.
Hopefully, at least one of our fixes helped you out and you did not have to resort to the last solution of reinstalling Google Chrome.