“Success is how high you bounce when you hit bottom.”
–George S. Patton
External disk drives have been a very important invention in the modern world. These storage devices help us store, transfer and transport data from one computer to another. Before their invention, people used a floppy disk as a means of temporal data storage. Floppy disks had a maximum size of about 1.44 MB. Nowadays, we have hard disk drives which have a maximum capacity of 1 TB. This implies that in the past, you needed 711 floppy disks to match the capacity of a 1 TB hard drive. This just shows you how technology has advanced. Using a hard drive, we are able to store and transfer a very large amount of data – especially when the built-in drive of our computer has a smaller capacity which should be preserved for import system files. These external hard drives are also used to Store backup data on your PC so that if your system crashes, you will be able to recover the lost information.
Pro Tip: It is possible to fix many PC issues by using the PC Repair tool. PC Repair is easy to use and reliable Windows optimization software developed to fix hundreds of system issues.
Special offer. About Outbyte, uninstall instructions, EULA, Privacy Policy.
But what happens when your external drive won’t mount on Windows 10? We are here to provide you with and guide you through adequate solutions or methods to follow when you start witnessing mount/eject/boot issues with your external hard disk.
We are going to break down this guide into 3 sections:
- Methods to use when your external hard drive won’t mount on Windows 10.
- Methods to use when a mounted external hard drive won’t eject on Windows 10.
- Steps to follow when an external drive won’t boot on Windows 10.
Section 1. External hard drive won’t mount on Windows 10.
Mounting is the process by which your computer’s operating system makes any kind of external storage devices accessible through the computer’s file system. Data on your storage media is stored in specific, well-structured file formats. Information on the drive can be stored in different formats. Your computer must be able to recognize these formats for it to interpret the information on the drive correctly.
Mounting makes sure that your computer is able to recognize the media’s format. The device will not be mounted if your computer cannot recognize the format. The process is successful when your computer integrates the media’s file system into its own file system and creates a mount point. This is a link through which your computer is able to access the external drive. It is usually represented as a letter (E:/, D:/, etc.) depending on how many drives are attached to your PC.
This process should not be very complicated, and it takes about a few seconds. Windows 10 has the Plug-and-play feature which makes it easier for it to read external drives.
Before you start trying any of the solutions, you should connect your external hard disk to another computer to see if it works. This will eliminate the possibility of any hardware issues.
If the external drive works fine on the other computer, then you need to follow the instructions below:
Try another USB port on your computer. The port may be the culprit.
Reinstall the driver:
- First, connect the external drive to your computer.
- Right-click on the Start or Home button and select Device Manager in the pop-up menu.
- This opens the Device Manager panel.
- On the menu bar, click on View and Select Show hidden devices.
- Double-click on Disk drives or click on the arrow beside the disk icon to expand it.
- Right-click on the external drive and select Uninstall device.

- Restart your PC and the driver will be automatically reinstalled.

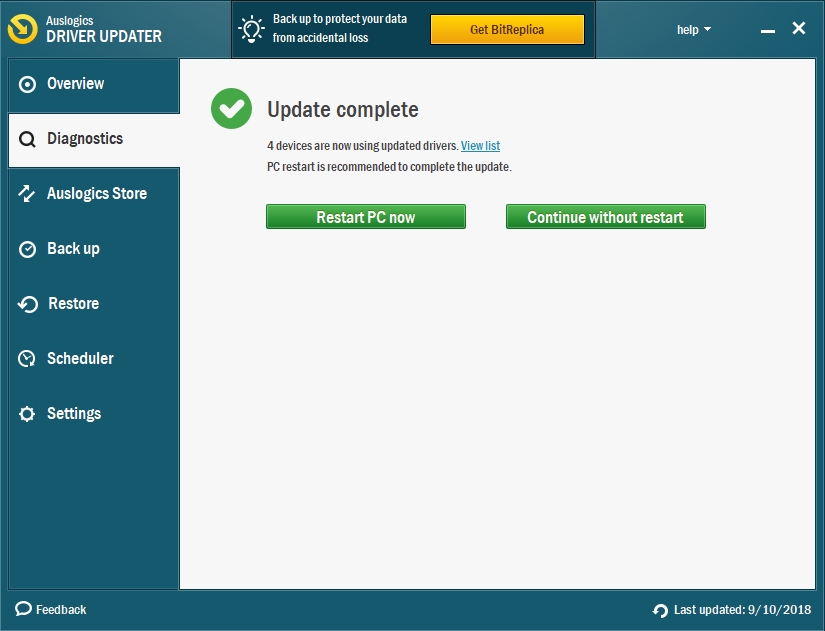
Alternatively, you can download and install Auslogics Driver Updater. This tool will update all your drivers in just one click. It scans your computer for outdated or missing drivers and downloads and installs the manufacturer-recommended versions. It saves you a lot of time.
Run Hardware and Device troubleshooter:
This is a built-in tool created by Microsoft to solve issues that occur with your PC without seeking the help of a professional. To run this tool, follow these steps: 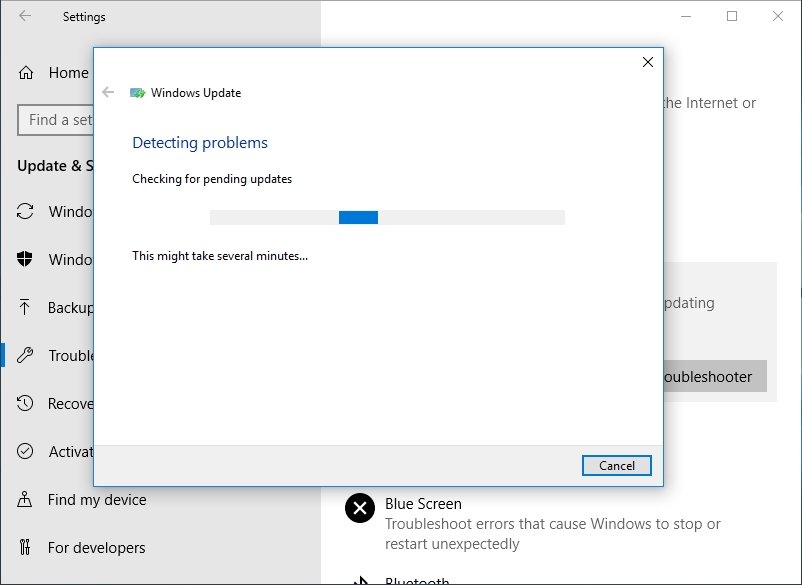
- Right-click on the Start or Home button and select Settings.
- Select Update and Security.
- Click the Troubleshoot tab in the left panel.
- Select Hardware and Devices under the Find and fix other problems menu
- Click Run the troubleshooter.
- Windows will try to repair issues with your devices.
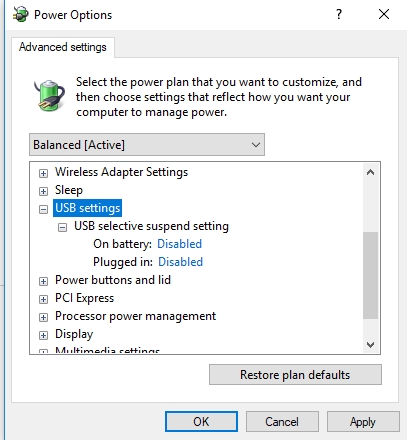
Change USB power settings:
- Press the Windows key + I on the keyboard to open Settings.
- Click on System.
- Click the Power and Sleep tab.
- Click Additional power settings under the Related settings option.
- Click on Change plan settings beside the power plan you are using.
- Select Change advanced power settings.
- Go to USB settings > USB selective suspend settings and disable it.
- Click OK, then Apply to save the changes.
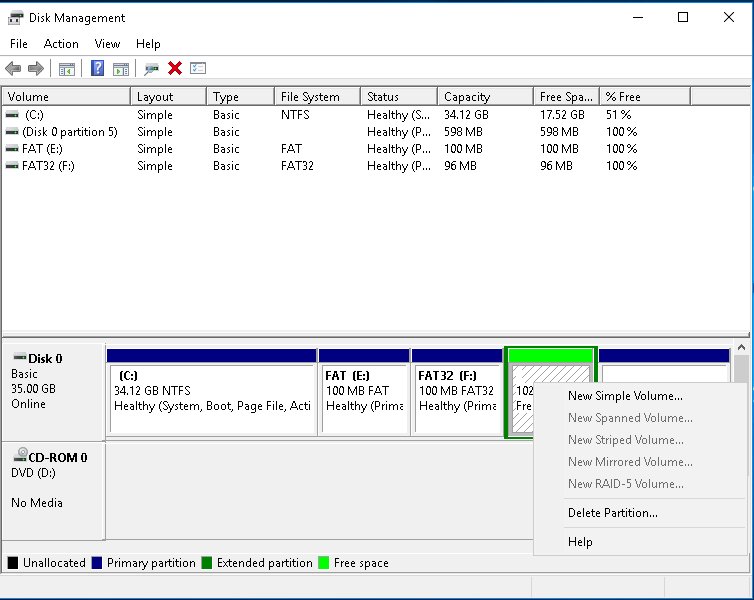
Create a new volume:
- Press Windows key + R on your keyboard to open the Run dialog box.
- Type diskmgmt.msc in the search box and press Enter.
- This will open the Disk management window.
- Right-click on the unallocated space and select New simple volume.
- Choose the size of the volume and click OK to confirm.
- Disconnect your external hard disk and plug it again.
Format your external hard disk using the NTFS format:
- Click the folder icon on the taskbar to open Windows Explorer.
- Right-click on This PC and select Format.
- In the next window, select Start.
- Windows will format and erase all information on the drive.
Section 2. The mounted external hard drive won’t eject on Windows 10
Users have also reported that sometimes they find it difficult to eject the external drive, using the safely remove option. Most times they are forced to unplug the drive without using this option. This problem is usually caused by background processes. Also, unplugging the drive without using the safely remove option can cause more errors to occur and even damage the external drive. Follow the instructions provided below, and hopefully, you will be able to eject your drive the right way without the risk of data corruption:
Reboot your PC.
- Before trying to eject the drive, make sure that no file, folder or application which is stored in the drive is in use. If you find any, close it and try ejecting.
- Temporarily disable your antivirus. This may also affect the ejecting process because the antimalware may be scanning the external drive while you are trying to eject it.
- Try ejecting it from This PC:
- Click on the folder icon on the taskbar to open Windows Explorer.
- Click on This PC.
- Right-click on the external hard drive and select Eject.
Use third-party software for ejecting the drive.
There are lots of them available on the internet. They are capable of closing all applications in use from the drive and eject it properly.
Troubleshoot the external disk drive.
Try changing the advanced settings:
- Connect the external disk drive.
- Right-click the Start or Home button and select Device Manager.
- Double-click on Disk drive to expand it.
- Right-click on the external drive and select Properties.
- Navigate to the Policies tab, select Better performance, and click OK to save the changes.
If none of the above steps work, then format the external drive using the NTFS format.
Section 3. External disk drive does not boot on Windows 10. Nowadays, it is even possible to have an operating system installed on an external drive which can be carried around. But there have been some reports by users complaining that they are unable to boot from their external hard disk. Most often BIOS is the culprit. We have provided some steps on how to troubleshoot this issue below:
When trying to boot from an external hard disk, connect it to a 2.0 USB port. Do not connect it to a 3.0 USB port because Windows 10 find difficulties booting 3.0.
Update your system BIOS. The BIOS is a PC component which permits you to change your hardware settings without booting into Windows. Most users update their BIOS to gain access to new features and improve stability. Updating the BIOS is a complex process and should be done only when necessary. Also, when updating, you need to make sure the process is not interrupted (power shortage, unexpected shutdown, etc.) because this may lead to permanent damage to your motherboard.
Before you update your BIOS, you need to know its version, which can be found in the BIOS settings. Go to the support section of the website of your motherboard’s manufacturer and download the BIOS update. Be extra cautious when downloading because if you install a different version, your system will malfunction. Once the file is downloaded, move it to a flash drive. Make sure that only the update is present on the drive. Now, access the BIOS settings by pressing the DEL or a Fn key depending on your motherboard manufacturer before the Windows logo displays. Alternatively, you can access the BIOS settings from Windows 10:
- Click the Start or Home button and click the Power option.
- Hold down the Shift key and select Restart.
- Your computer will restart into the BIOS settings.
- Once in the BIOS settings, navigate to the BIOS update option and select it. Now, choose the update file you downloaded into the drive and wait for the BIOS to finish updating.
If the above methods do not work, then your next option is to format the external drive using the NTFS format and create a new bootable device.
We hope that this article has helped with the external drive issues. Share it with others who encounter similar problems.
We appreciate your ideas and comments.
We are ready to answer all your questions regarding the above topic.