Windows 10 is by far the best operating system created by Microsoft. It has several cool features and apps and with the advancement of IT technology, and we can only expect better features to come. But unfortunately, it is not the most stable operating system created by them. Users report issues very often while using Windows 10. The good thing is that Microsoft takes steps to resolve all these issues to give its users a better experience. That is why they release updates almost every 6 months.
Today we are going to be talking about one of the errors users commonly complain about i.e. issues with sound recording. This is a basic process in Windows 10 which users perform almost every day, but they neglect the fact it works correctly almost all the time. When users encounter the sound recording problem, they get very frustrated because it is something that has been working correctly for a long time and they are clueless of how to start repairing the problem. Fortunately, that is why we are here. Rest assured that we are going to find the solution to your problem. In this article, we are going to show you how to fix voice recording problem on windows 10.
The sound recording problem is not unique only to Windows 10. Users have encountered this issue in every version of the Windows operating system. Here are some of the reports users sent to us and other forums:
Pro Tip: It is possible to fix many PC issues by using the PC Repair tool. PC Repair is easy to use and reliable Windows optimization software developed to fix hundreds of system issues.
Special offer. About Outbyte, uninstall instructions, EULA, Privacy Policy.
- How to fix sound recording problem on Windows 10 – If you are experiencing recording problems, you will need to check your hardware like microphone device installed on your computer if it has any issues. We will also provide other solutions to try out in this article.
- How to troubleshoot microphone or audio recording not working – Luckily, Microsoft has a built-in tool for troubleshooting hardware and software errors. This helps users to fix minor problems without having to consult a professional. We will show you how to troubleshoot microphone and recording issues in Windows 10.
We always advise our readers to create a backup of their documents when trying out solutions. This is to make sure that you do not lose any data in case you make a mistake during the process.
Table of Contents
- Update your drivers
- Perform a Windows update
- Enable the recording device / microphone
- Adjust microphone levels
- Choose the correct recording device
- Turn on audio recording permission
- Install a different recording app
- Use the built-in audio and recording troubleshooter
- Clean boot your computer
- Restore your computer to a previous date
Solution 1. Update your drivers
A driver is a piece of software that helps your hardware component (in this case the microphone) to communicate with your operating system. If the driver is missing or outdated, your device will not work properly. That is why it is very important to always keep your drivers up to date. The process of updating your drivers is basic, and every computer owner should know how to do it. We have provided you with all the ways to update your drivers here:
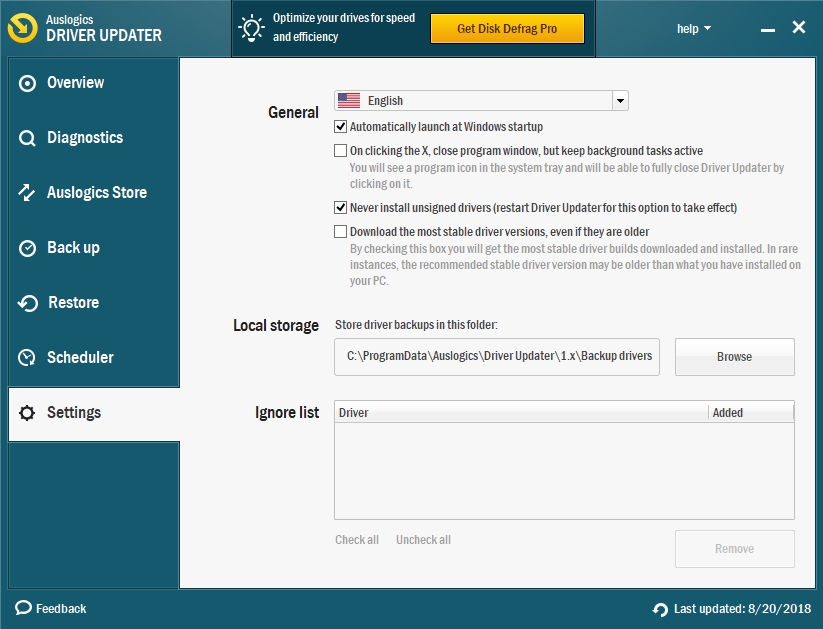
Method 1. Download and install Auslogics Driver Updater.
This is a driver updating tool which scans your computer for missing or outdated drivers and installs the latest manufacturer-recommended versions. It is very easy to use, and it will save you a lot of time. Here is how to use it:
- Download the tool from the link provided above
- Go to the download folder and run the setup file. This will open the Auslogics Driver Updater installer
- Choose your preferred language and select the Click to install and check drivers button
- Wait for the files to extract and finish installing
- When this is done, Auslogics Driver Updater will automatically open into the Diagnostics tab and begin scanning your computer for missing or outdated drivers
- Once it is done, you will see the list of drivers you need to update or install for your PC
- Click Install all to update all your drivers
Method 2. Install your drivers via Device Manager
Device Manager is a built-in Windows tool used to update your drivers. Follow these instructions to use it:
- Right-click on the Start or Home button and select Device Manager. This will open the Device Manager window
- Double-click on Sound, video and game controllers to expand it, and you will see the audio device which is installed on your PC
- Right-click on it and select Update Driver Software
- In the next window, choose Search automatically for updated driver software
- Windows will find and download the best driver for your device

Method 3. Download the driver from the manufacturer’s site.
To use this method, you need to know the name and version of the device which is installed on your computer, because downloading a wrong driver will cause the device to malfunction. You will find the drivers under the support section of the site. Also, some manufacturing companies have driver-support software which you can install on your PC, and it will detect drivers that need updating.
Solution 2. Perform a Windows update
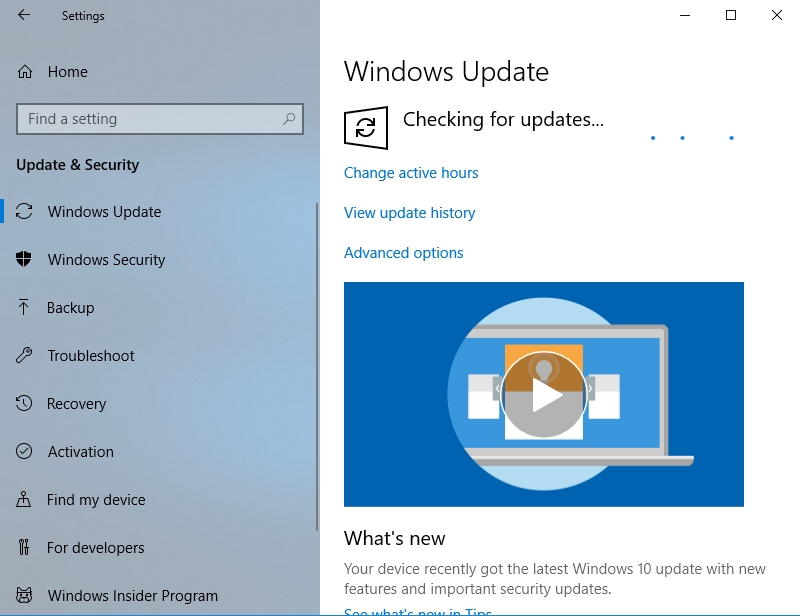
Microsoft releases updates almost every 6 months in response to users’ complaints and also to improve user experience. Installing the latest updates may help you with the microphone and recording problems you are facing. Use the following steps to check for your Windows updates:
- Press the Windows key + I on your keyboard to open the Settings app
- Select Update and Security from the list of available options
- Go to the Windows Update tab and click Check for updates

- Windows will find and download any available update for your computer, and this may resolve your issue
Solution 3. Enable the recording device/microphone
Your PC may be using more than one recording device. Make sure that the one you are using is enabled. Do this using the following instructions:
Right-click on the volume icon on the left corner of the taskbar and click Sounds
Navigate to the Recording tab and make sure that the recording device you want to use is enabled. Some devices may also be hidden. To view them, right-click on the list and select Show disabled devices.
Solution 4. Adjust microphone levels
It could also be possible that the volume of your recording devices is very low, and that is why you are not getting any audio. To check the volume of your microphone:
- Open the Sound dialog box and go to the Recording tab
- Right-click on your default microphone and select Properties. This will open the Microphone Array Properties
- Go to the Levels tab and adjust it to the level that suits you. Make sure that it is high enough to be able to pick up sound
Solution 5. Choose the correct recording device
When you have multiple recording devices installed on your computer, you will have to make sure that Windows has chosen the correct recording device. If you are using a headset, you will have to make sure that it is enabled. There are lots of cases when users have connected a wireless headset to their computer and they are trying to use the computer’s built-in microphone. This will not work because Windows automatically sets it to the microphone of the wireless headset. If you want to change it, you will have to disconnect the wireless headset, open the Sound dialog and enable your computer’s built-in microphone from the Recording tab.
Solution 6. Turn on audio recording permission
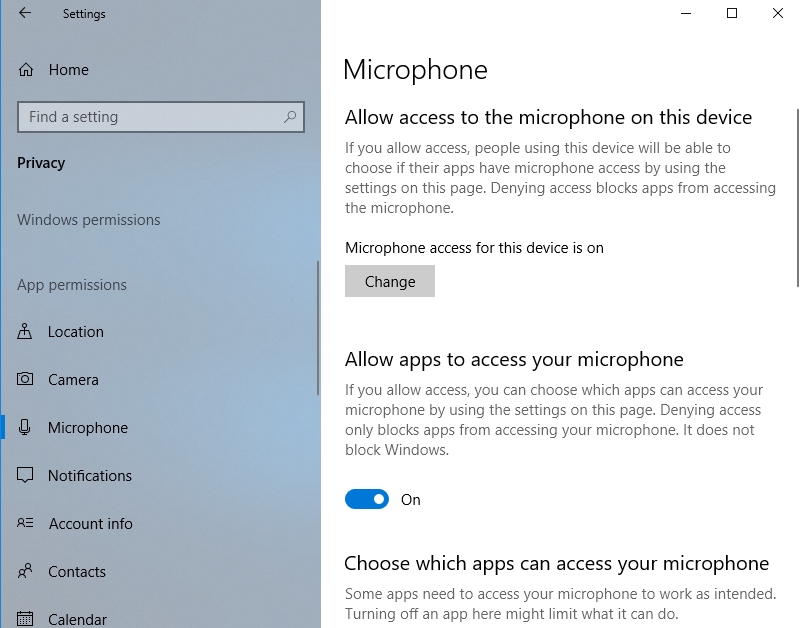
Windows 10 has come along with a lot of cool features which have given users lots of control over certain options on their computer. If we can’t manage these features correctly, they may turn around and cause more harm than good. Windows 10 gives users the option to enable and disable the microphone within apps. Use the following steps to access these options:
- Press the Windows key + I on your keyboard to open the Settings app
- Select Privacy from the list of options available
- Navigate to the Microphone tab under the App permissions option. Here, you will see a list of applications on your PC which can use the microphone
- Make sure that the app with which you want to use the microphone is enabled
Solution 7. Install a different recording app
Sometimes, our computer may not be the one at fault. The recording app you are using may not be compatible with the version of Windows you are using. We advise you to try changing the recording app and see if it solves the issue. There are lots of free recording apps on the internet. You can check reviews and download the one you best see fit.
Solution 8. Use the built-in audio and recording troubleshooter
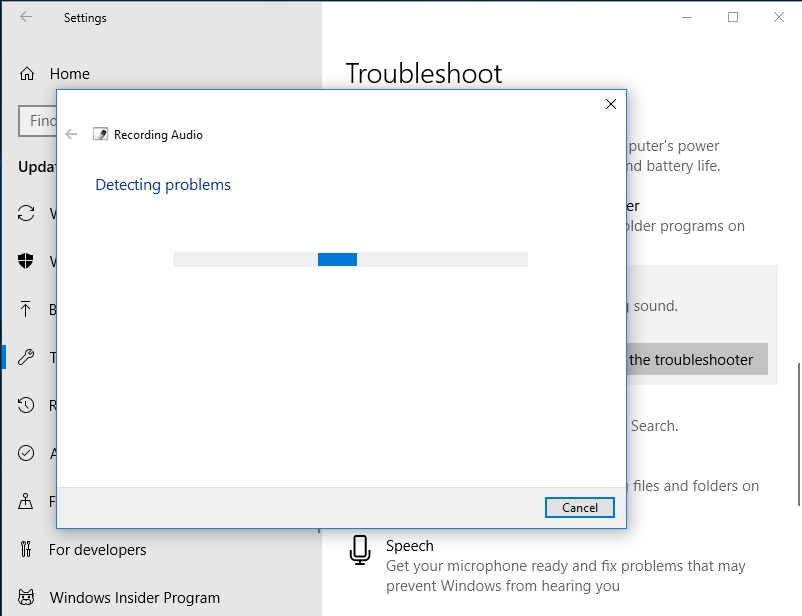
The built-in troubleshooter helps users solve commonly reported issues so that you do not need to seek professional aid often. This tool will automatically scan and fix any issues with your audio and recording devices on your computer. Here is how to run the troubleshooter:
- Click on the Start or Home button and select the Settings icon. This will open the Settings app
- Select Update and Security from the list of options available
- Select Troubleshoot on the left side of the windows
- Scroll down to Recording Audio on the Find and fix other problems option. Select it and click Run the troubleshooter
- Windows will now look for problems with your audio and recording devices and try to fix them
Solution 9. Perform a Clean boot of your PC
Performing a Clean boot of your PC will help you to detect any third-party app or service which is preventing your recording app from working. Use the following steps to perform a Clean boot:
- Press the Windows key + R on your keyboard to open the Run dialog box
- Type msconfig in the search area and press Enter. This will open the System Configuration dialog box
- Go to the General tab and click Selective startup, then uncheck the Load startup items
- Now, navigate to the Services tab and check the Hide all Microsoft services box and click Disable all
- Click Apply and OK to confirm the changes you made
- Restart your computer and check if the problem has been solved. If yes, then you will need to go back to System Configuration and enable the services individually to note the one which is causing the problem
Solution 10. Restore your computer to a previous date
This method is useful if you hade made some changes to your computer system which have caused your microphone to stop working and you don’t know how to revert the changes. This tool will be able to restore your PC to a date before you made the changes. Note that you will not be able to use this method if you did not create restore points in the past. Also, Windows creates automatic restore points when important changes want to take place on your computer. Users are usually concerned about their documents, but do not worry this process will affect only your system settings and will not interfere with your documents, music, and videos. Use the following steps to restore your computer to a previous date:
- Click the Start or Home button and type recovery in the search box. Select Recovery from the list available results. This will open the Recovery dialog box in Control Panel
- Select Open System Restore and click Next in the next window to proceed
- Now, you will see a list of dates to which you can restore your computer. Choose a date before you encounter the recording issues and click Next
- Windows will now restore your PC to that date, and the recording problems will be resolved
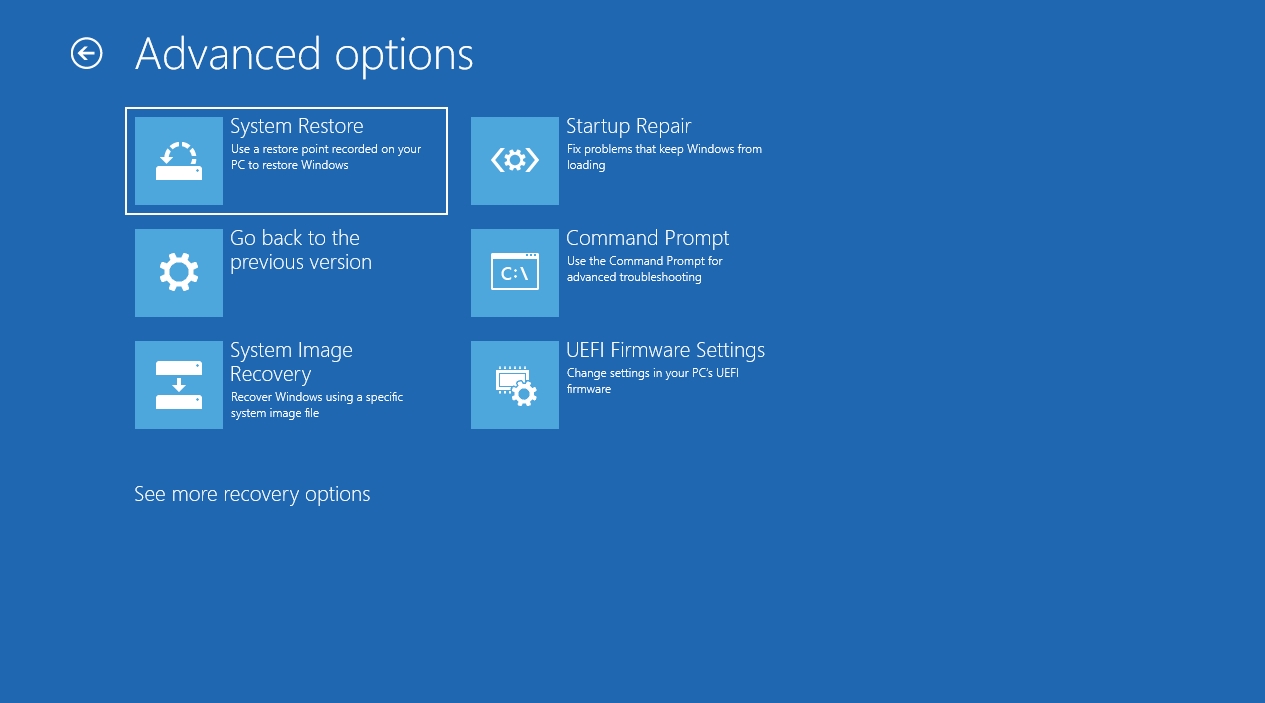
Another way to use the system restore is through the Choose an option screen:
- Open the Settings app and go to Update and Security
- Click on the Recovery tab and select Restart now under the Advanced startup option
- Your PC will restart into the Choose an option screen
- Go to Troubleshooter > Advanced Options > System Restore
- Follow the instructions of the wizard to restore your PC to an earlier date
We hope that this article has solved your recording problems on Windows 10. Share it with others who encounter similar issues.
We appreciate your ideas and comments.
We are ready to answer any of your questions regarding the above topic.