Many users have already had the chance to appraise the many new features that Steam has made possible on a PC, such as multiplayer games and the full-screen immersion into virtual worlds. Using Steam has opened new possibilities for graphic designers to perfect their art and create new and exciting imagery to many users’ content. However, the technical issues are not absolutely up to speed with the visual capabilities that this platform can provide. Sometimes they collide and produce malfunctions or frustrating errors. Many of these errors are easily fixable, however, some are not. This article will focus on resolving an error that reads, “Steam needs to be online to update” error. This is a strange but annoying error that most likely can be resolved by some of the fixes we have collected below. Skim through them first to find out what could have caused this issue on your Windows 10 and take action accordingly.
First, let’s try to contain the amount of information and check all the incoming data:
- What computer are you using Steam on?
- Is the computer updated?
- When was the last time you updated your computer?
- Have you checked that your drivers are compatible with your system?
If you are dealing with Steam needs to be online to update on Windows 7 issue, then you should try out the first solution:
Method 1. Try to run Steam in Compatibility Mode.
Follow these steps to ensure that you are doing everything correctly:
Pro Tip: It is possible to fix many PC issues by using the PC Repair tool. PC Repair is easy to use and reliable Windows optimization software developed to fix hundreds of system issues.
Special offer. About Outbyte, uninstall instructions, EULA, Privacy Policy.
Step 1. Right-click the Steams shortcut logo and enter Properties
Step 2. Open the Compatibility tab 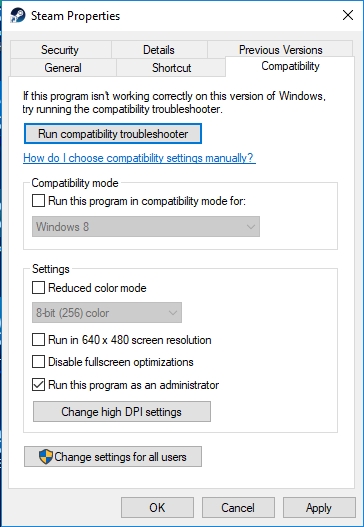
Step 3. Run this program in compatibility mode and remember to select Windows 7 from the list of options
Step 4. An additional option is to also check “Run this program as an administrator”
Step 5. Start Steam again and see if it works
Step 6. You can also run Steam game in compatibility mode on Windows 10
Method 2. Disable Windows Firewall.
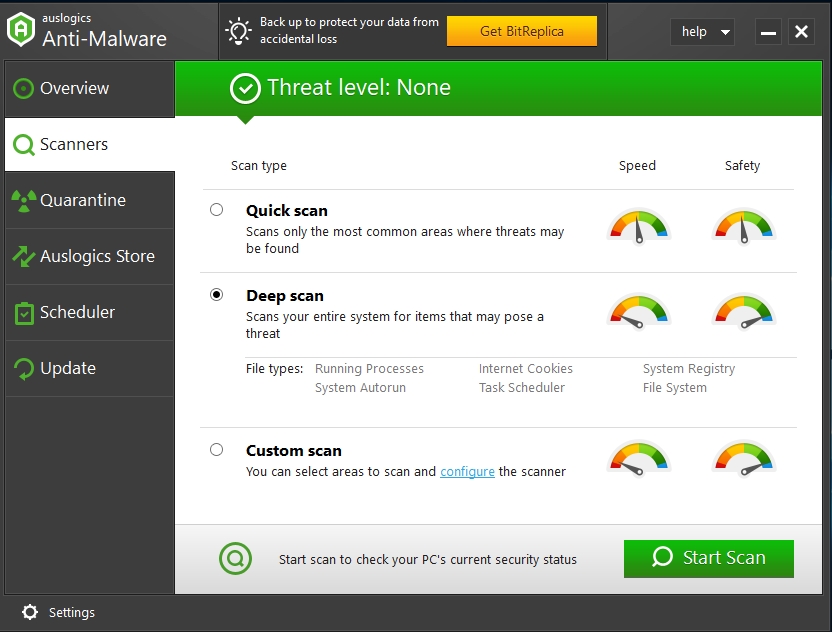
Remember that you are executing the disabling at your own risk, so make sure you have other tools to protect your computer from viruses and malware. Try Auslogics Anti-Malware to ensure the safety of browsing when you are using Steam without Windows Firewall to safeguard your personal information.
Step 1. Select simultaneously Windows key + S and type “Firewall” into the search box, hit Enter
Step 2. When Windows Firewall starts, find the option to Turn Windows Firewall on or off and select ‘off’ for both private and public network settings
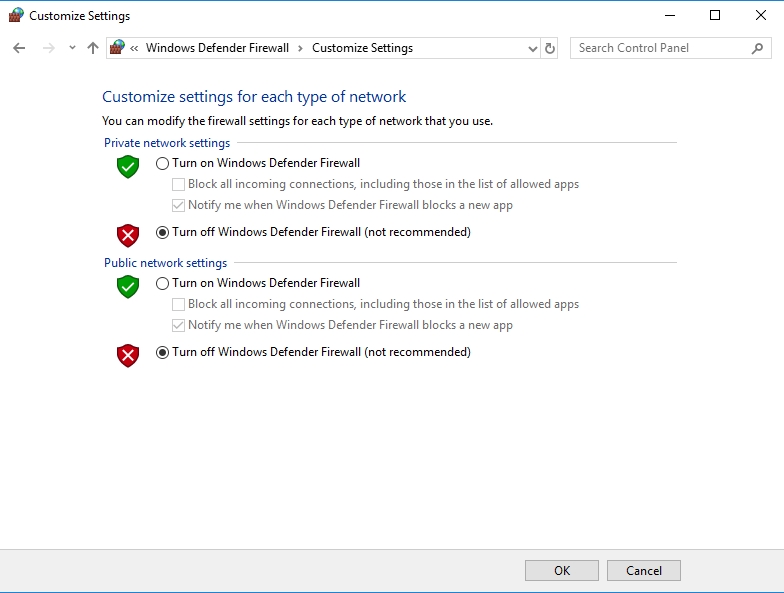
Step 3. Click OK to save the changes you made
Step 4. See if Steam runs and be sure to update it as quickly as possible. Remember to switch the Windows Firewall back again.
Same tip, different tool. You can temporarily disable your antivirus. Some users have reported that the “Steam needs to be online to update” error can be caused by your antivirus software. If that is the case, you can always add Steam to the list of programs that are allowed as executions in your antivirus software. If that doesn’t work, disable the antivirus all-together. If it doesn’t help, your problem is not connected to the antivirus. Be sure to enable it again and proceed to other solutions.
Method 3. Clean the Steam directory.
If for some reason you don’t want to try any of the methods described above, you can always make do with a clean-up.
Step 1. Follow this pathway: C:Program FilesSteam or C:Program Files (x86)Steam
Step 2. Select all files in the folder except for Steam.exe and Steamapps and delete them
Step 3. Restart your computer
Step 4. After the reboot, go to the directory again and run Steam exe. This should restart the whole application, and it should work normally.
Three of the following solutions are actually workarounds rather than the actual fixes of the issue, but they can be of help if you’re not interested in digging deep.
Method 4. Use Registry Editor.
You can change a few registry values without any harm to your computer, and you can do that by using this quick guide:
Step 1. Use the shortcut of the Windows key + R and type ‘regedit’ into the Run box, hit Enter
Step 2. When the Registry Editor opens, go to this setting: HKEY_CURRENT_USER/Software/Valve/Steam
Step 3. Click Offline for DWORD and set delete Value Data to 0. 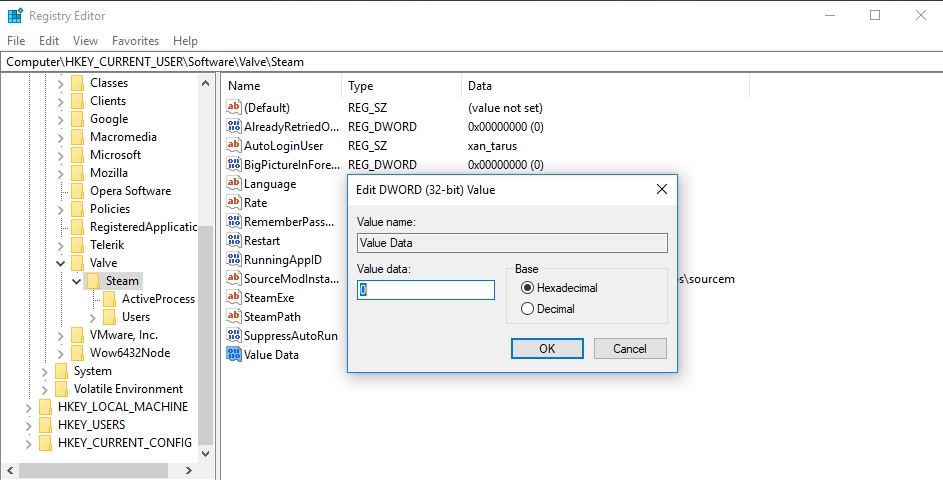
Step 4. Close the Registry Editor and restart your PC. This should eliminate the problem, and Steam should be able to update.
Method 5. Replace Steam files from another computer.
For this fix, you will need another computer that has Steam running on it and a USB drive.
Step 1. Go to the Steam installation directory and copy all the files from the Steamapps folder to the USB flash drive
Step 2. Paste all of these files to your Steam installation directory. You will be asked to overwrite files, select Yes.
Step 3. Run Steam.exe and see if the issue is resolved.
Method 6. Edit the Steam shortcut
Step 1. Right-Click the Steam shortcut
Step 2. Select Properties from the menu
Step 3. Go to the Shortcut tab
Step 4. Locate the Target section and add -tcp after the quotation marks
Step 5. Click Apply and OK to modify the settings and save them
Step 6. Run Steam and see if this easy fix helped.
The following methods should be used if you have already tried all the solutions based on the software settings and you have now eliminated the possibility that something has gone array within the program. The fixes below pertain to network issues and possible connection errors that lead to ‘Steam needs to be online to update’ in Windows 10.
Method 7. Disable Proxy settings in Internet Explorer
Step 1. Open Internet Explorer and click on the Tools icon
Step 2. Use Internet Options
Step 3. After it opens, enter the Connection tab and locate LAN setting at the bottom of the page
Step 4. See if the box next to “Use a proxy server for your LAN” is checked. Uncheck it if it is.
Step 5. Click OK to save the changes. Your issue must be solved.
Method 8. Modify your DNS settings.
Step 1. Use the Windows key + S shortcut and enter Network and Sharing
Step 2. In the Network and Sharing Centre, select Change adapter settings
Step 3. Right-click your current network adapter and choose Properties
Step 4. In the Internet Protocol Version 4 (TCP/IPv4), enter Properties
Step 5. In the opened window, select the Advanced button at the bottom of the page
Step 6. Go to DNS tab. If you have any addresses in the DNS, write them down just in case.
Step 7. Add and enter 8.8.8.8 and/or 8.8.4.4. 
Step 8. Save the changes and restart your network connection. Using Google DNS can help with the issue you are having.
Method 9. Disable Steam from an automatic startup.
The error may occur because the network connection had not been established before the startup process was complete. To disable this feature, follow these steps:
Step 1. Go to Steam> Settings
Step 2. Open the Interface tab and uncheck the Run Steam when my computer starts feature
Step 3. Click OK
Step 4. Restart Steam and see if it works when the connection has already been established.
Method 10. Run SteamTmp.exe.
Another possible fix is to run SteamTmp. It’s located in the Steams installation directory, and some users have reported that simply running this .exe file has fixed the error they were having. We suggest you try it too.
If you are still having the error “Steam need to be online to update”, you might be experiencing a case of a missing files or malware infection. Therefore, we suggest you use Auslogics Anti-Malware to locate the infected file and repair it before it has the opportunity to infect other files on your hard drive.