People use a VPN mostly for reasons best known to them. Some are trying to connect to the internet anonymously or attempting to maintain a certain level of privacy, a good number of users want to watch video content on Netflix not meant for their geographical location, and so on. Although their motives differ, their needs exist along the same line of thought.
VPN programs, for the most part, work well. Of all the issues that a user may face while using a Virtual Private Network, connection problems are the worst because they could compromise an individual’s security or negatively affect a user’s experience.
Pro Tip: It is possible to fix many PC issues by using the PC Repair tool. PC Repair is easy to use and reliable Windows optimization software developed to fix hundreds of system issues.
Special offer. About Outbyte, uninstall instructions, EULA, Privacy Policy.
For example, if the VPN constantly gets disconnected while in use, then a user’s IP might become visible or a streamer’s video might end up buffering indefinitely due to that leak in connection. In such scenarios, it is fair to question the ultimate purpose of a private network. After all, its use could become counterproductive when there is a loss of privacy for users or in situations where people suffer severe convenience downgrades.
Do your best to choose an excellent VPN provider. With the best providers, you would experience fewer issues. Also, there are some problems you cannot solve yourself. Your private network provider handles such complications. If their customer service is weak, you might suffer for it.
If your VPN won’t work on Windows 10 (or older operating systems) and you believe your private network firm is not to blame for your headache, then you are in the right place. In the guide below, we will show you how to troubleshoot and resolve connection problems that are independent of your VPN provider.
How to solve VPN connection problems?
Perform basic troubleshooting operations and procedures:
Here are a couple of things you should try out first to be sure of the source of the connection issue:
- Stop whatever it is that you are doing now with your private network. Terminate your VPN session or activity. Close the application if necessary.
- Try connecting to the internet on your standard connectivity settings or configuration. You are doing this to make sure that your internet connection itself is working well. Open your web browser and attempt visiting some websites. If the pages load just fine, then your internet connection is probably in order
- Examine the programs currently running in your operating system environment and check that everything there is in a good state. Verify that Windows is not running other VPN applications. Disconnect and exit any unnecessary connectivity application that could tamper with your VPN’s activities
- Open your antivirus, antimalware program, apps with a firewall or other security applications and check that they are not interfering with your VPN. You can attempt disabling their settings or try to limit their operations. You can now check if your system can successfully reach the servers on the web. If you can connect to the internet, then you know the software to blame for your headache
- Now open your VPN application once more, log out then log in again. Ensure that you typed in the correct credentials or details (username and password). If you are using a free account, check that you have not exceeded your bandwidth limit or verify that your VPN provider is still providing you with internet access
- Test as many servers as possible on your VPN to see which one of them works best for you. Open your browser and search for “my current IP” without the quotes to see what Internet Protocol you are currently using to go online. This address should differ from your actual IP or location if your VPN is doing its job properly
Check the values for date and time:
Date and time make up configuration details that are necessary for a VPN application to work correctly. If your system’s date and time settings are incorrect, your private network might experience issues while trying to reach the required servers. Follow these instructions to view the date and time settings on Windows 10:
- Right-click on the date and time displayed on the taskbar of your regular desktop screen. Select Adjust date and time settings from the options that show up
- After the Settings window opens, click on the Change button under Change date and time (on the right-hand side of the Date & Time menu)
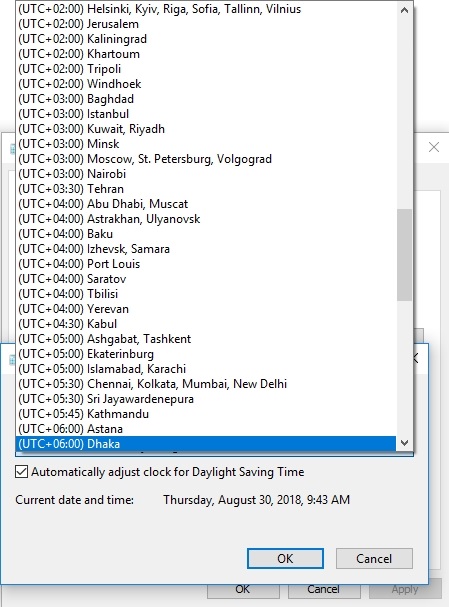
- In the dialog box for Date and Time settings, input the correct values for your date and time (confirm that the data you are typing in is correct and comes from a reliable source). After doing this, click on OK
- Now, you must choose your current time zone correctly if necessary: click on Change time zone. In the drop-down list, select the time zone that applies to your geographical location as accurately as possible. Now click on OK

- After saving the changes you have just made, exit the Settings window. Disconnect your VPN program and close the application. Open the app once again and try connecting to your desired server location as usual.
Use a different VPN protocol:
Your VPN connection is dependent on the way your Internet Service Provider, firewall, device, and router handle certain protocols. If you are experiencing connection problems, then there is a good chance that something is blocking, redirecting or interfering with the traffic of a particular protocol in use. Thus, connectivity failure comes to be.
You can alter the protocol your VPN uses to connect and see if anything changes for the better. The amount of options available depends on your VPN service provider. Almost all private network programs include TCP (Transmission Control Protocol) and UDP (User Datagram Protocol). Follow these instructions to choose a different protocol:
- Open your VPN application. Ensure that it is inactive (not connected to any server or trying to). Open its options or settings menu
- Locate the protocol tab or window. Select the new protocol that you intend to use. Click on Apply or OK to save the changes you have just made
- Restart your VPN and try to connect to your desired server location. If you are successful this time, then continue using the new protocol you selected
Fix problems with drivers:
Some particular drivers are vital in VPN operations, but any problem with their software can severely disrupt the performance of a private network or even stop a user from reaching the internet at all. Some users confirmed that they were able to resolve their issue by removing and restoring these drivers. Here are the instructions you need to follow:
- Right-click on the Windows start icon always visible on your desktop screen to see a list of programs and procedures. Select Device Manager.
- After the required window opens, locate Network Adapters from the list of driver devices present. Click on it to see the items it is composed of.
- You should see the following items: WAN Miniport (IP), WAN Miniport(IPv6) and WAN Miniport (PPTP). Right-click on each of them (one at a time) and select Uninstall to remove them.
- Click on Action (you should see this option in the upper section of the Device Manager window). Select Scan for hardware changes. This operation should bring back the drivers you uninstalled not so long ago.
- Now terminate your VPN session if there is any currently running and close the app. Reopen the application and try to connect to your desired server or location. You might finally experience success.
Create exceptions for your VPN application:
Earlier we explained that interferences from your antivirus, antimalware application, firewall and other security products or conflicts between these applications themselves (or negative interactions between them and your VPN software) might be the cause of your connection problems.
The situation is not surprising at all. After all, these powerful programs have access to a lot of permissions or rights. Therefore, they might overreach in their numerous efforts to protect you and negatively affect other things while trying to execute specific functions.
You can completely disable these programs or severely limit their operations, and then check if your connection issues disappear. If you can now connect to a server location and browse the web smoothly, you may have correctly identified the source of your problem.
Now you must alter the settings in your security program to make your solution permanent and allow it to work at the same time. You should add your VPN app into the whitelist (if available), create exceptions for the private network program that would allow it to work undisturbed, ask your security program to trust your VPN application, lower the security level in the problematic software, and so on.
After carrying out the required operations above, you must restart your VPN software to test the effectiveness of the procedures. If it fails regardless of everything you do, then maybe your VPN application and your security setup are just incompatible with one another.
You might be forced into choosing between programs. Your private network app or your security software? Only you can make the right choice.
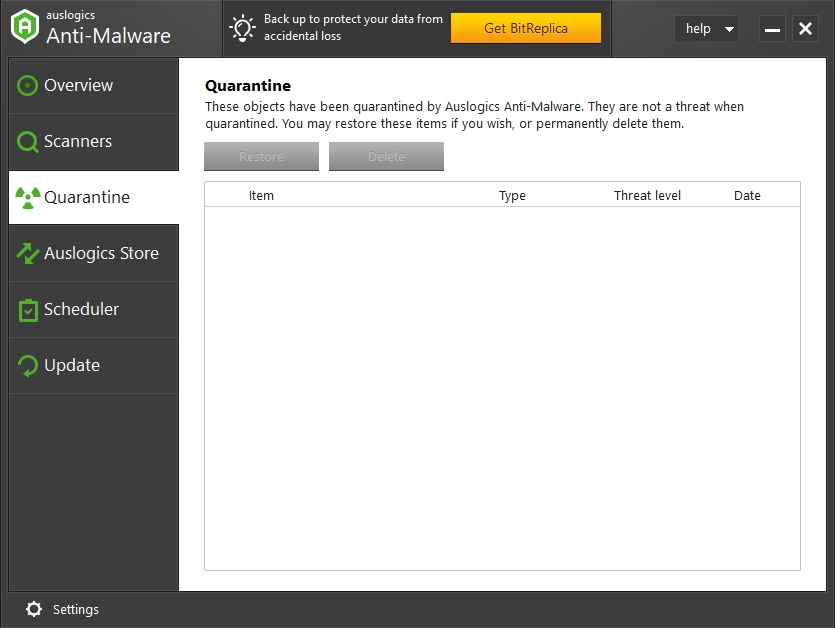
After getting rid of either of the applications involved, you can try out alternative programs to maintain the usual state of your computer. We recommend that you use an excellent antimalware program like Auslogics Anti-Malware. This superb security program does not interfere with the operations of your main antivirus. It also does not disrupt the activities of essential applications.
Remove and re-install your VPN:
Reinstallation of your VPN application is a procedure easy enough to carry out that can force a change in your connectivity configuration for the better. Here are the instructions for removing the private network app running on a system with Windows 10:
- Click on the Windows start icon. Select Settings from the list of programs or options that show up.
- Click on System. On the left pane, select Apps and features. Now you should see the list of the installed applications on your system.
- Locate the VPN program that you intend to get rid of, and then click on it. Click on the Uninstall button that comes up. You should see a dialog requesting confirmation for the operation.
- Click on Uninstall to confirm and move on. Follow any instructions where applicable.
- After the uninstallation is complete, reboot your PC. After your system comes on, open your browser and download the VPN application. Install it as appropriate. After completing the setup, input your login details or credentials to sign in. Try to connect to the internet as usual through the prime server location.
You can perform a different operation on the registry that should deliver the same effect or changes very similar to what occurred above:
- Press and hold the Windows button on your keyboard, then tap the letter R to open the Run program. Input the following code in the available text box and hit the Enter button to execute it: regedit
- You might see the User Account Control dialog box coming up to request some confirmation for your action. Click on Yes to move on. The Registry Editor program should launch now.
- After the required window loads, look under Computer. Double-click on the HKEY_LOCAL_MACHINE entry. In your current location, you should see SOFTWARE. Double-click on it.
- Now locate the entry for your VPN program. It should be there as [your]VPN. If you cannot find the required item, navigate through the following path and check for your VPN software there instead: SOFTWARE > Classes> [your]VPN
- Once you have identified your VPN entry and you are sure of it, right-click on it and select Delete. After the removal of the item, your VPN should no longer be visible under Wow6432Node
Ensure that you are using the latest version of your VPN application. Many developers release apps with bugs that could cause connection issues, but they always try to correct these problems by providing patches for them in future upgrades.
If you are not sure that the VPN program you are running is the most recent release, follow these instructions to get the latest build regardless of the provider you are using:
- Connect to the internet (without your VPN if necessary for a smooth browsing experience). Visit the website of your VPN provider and enter your login details to sign into your profile there.
- Click on the Set Up VPN button or an option similar to this. Choose the platform or operating system on which you intend to use the private network service.
- Click on Download to get the latest version of the VPN app available for your device. After your browser downloads the package, click on the saved item (usually an executable file) to run it. Follow the instructions if necessary to complete the installation and set up the VPN service on your system. Once you are done with everything, check if you can now connect with the newer build.
Alter your DNS settings:
Microsoft unintentionally fostered some DNS issues after it released its latest operating system with significant changes in the resolution of Domain Name Servers. If your connection issue is reflected as low speeds (upload and download), you can stop using your DNS’ default server and try a different one. Chances are that your connection will become a lot smoother.
Follow these instructions to use a new DNS server on a system running Windows 10:
- Open the Run app. You can do this by right-clicking on the Windows start icon and selecting Run from the list of applications and operations that show up. Type the following code into the text box present and tap the Enter key to execute the command: ncpa.cpl
- Under the window for Network Connection, locate your regular connection or system connectivity link. It should be the Local Area Network (LAN) or some wireless network connection.
- After you have identified the necessary connection, right-click on it and select Properties. Double-click on the Internet Protocol Version 4 (IPv4) to change or set a new DNS server address. If this option is not there for you to click on, double-click on Internet Protocol instead for a similar result.
Click on Use the following DNS server address. We recommend that you input this one:
- Preferred DNS server: 8.8.8.8
- Alternate DNS server: 8.8.4.4
The values you have just input are the ones for Google’s DNS. They should work for everybody in the vast majority of scenarios. Otherwise, go online and check for some DNS values that would be suitable to use on your computer.
After the change in your DNS settings or configuration, a complementary procedure is in order—you should flush your DNS. This operation forces Windows to clear your DNS cache to allow it to speed up requests for IP addresses and thus, help your VPN DNS obtain correct entries. Go through these steps:
- Open a Command Prompt window with administrator privileges. The procedure you are about to carry out is not an ordinary one—it needs more permissions than regular tasks do. Right-click on the Windows start icon and select Command Prompt (admin) to open the program you need.
- After the required window opens, input this command and hit the Enter key to run the code: ipconfig /flushdns
The procedure is usually brief. If it was successful, you should see a message stating that Windows IP Configuration Successfully flushed the DNS Resolver Cache. Now try to connect to the internet through your VPN service and see what happens.
If you are still experiencing connection issues even after going through all the procedures above, then it is time you went online with a different ISP (through your VPN application of course) and check if anything changes. You can attempt using public W-IFI as its settings or configuration should differ enough from those of your regular provider.
If you somehow realize that your ISP is intentionally throttling your speed to extreme levels when you are using a VPN or completely cutting off your internet access, then you might have to switch to a different provider. Do this only if you care a lot about your anonymity or if the reason that got you using a VPN in the first place is really important to you.
Do not forget that you can also switch VPN providers—it might be cheaper or more efficient if you think things through. In fact, your ISP might not be to blame for your connection headaches. It might all be the fault of your VPN application. Not all private network firms are capable of providing robust and reliable services. Check for the top VPN brands and make a choice based on your needs and resources.