“Success means doing the best we can with what we have.
Success is the doing, not the getting; in the trying, not the triumph.
Success is a personal standard, reaching for the highest that is in us,
Pro Tip: It is possible to fix many PC issues by using the PC Repair tool. PC Repair is easy to use and reliable Windows optimization software developed to fix hundreds of system issues.
Special offer. About Outbyte, uninstall instructions, EULA, Privacy Policy.
becoming all that we can be.”
– Zig Ziglar
XPSSVCS.DLL is a DLL file which is connected with MSDN Disc 37 12, which is produced by Microsoft for the Windows operating system. 1.0.0.0 is the latest known version of XPSSVCS.DLL. It has a popularity rating of 1 with an unknown security rating.
Dynamic Link Library or DLL files like XPSSVCS.DLL are similar to an executable file in Windows. These files permit different software programs to perform the same functions. For example, if you are working on a Word document of Windows, the DLL file needed for printing is dormant until its function is required. When you decide to print, Windows loads the printer DLL file into the RAM and starts its function.
Why do DLL errors occur, and how to resolve the XPSSVCS.DLL not found problem?
Since DLL files are not specific to any program and are used by many programs within your operating system, errors with them occur anywhere and randomly. So, these errors appear when Windows is unable to load the DLL file which is required at a particular time. Notably, if it is the XPSSVCS.DLL file which is needed and cannot be loaded, then you will see one of the following messages:
- “XPSSVCS.DLL not found.”
- “The file XPSSVCS.DLL is missing.”
- “XPSSVCS.DLL Access Violation.”
- “Cannot register XPSSVCS.DLL.”
- “Cannot find C:\Windows\System32\\XPSSVCS.DLL.”
- “Cannot start MSDN Disc 3712. A required component is missing: XPSSVCS.DLL. Please install MSDN Disc 3712 again.”
- “This application failed to start because XPSSVCS.DLL was not found. Re-installing the application may fix this problem.”
These errors are usually prominent during Windows startup, when you are installing a program, or when a program related to XPSSVCS.DLL is running. It is important to keep track of this information because it is vital for troubleshooting this problem.
One of the most common reasons why users encounter this error is due to improper shutting down of the PC or virus infections. This makes the DLL file missing, corrupted, or unavailable for use. Thus, you get the error messages.
Another popular reason why the XPSSVCS.DLL error occurs is due to issues with the Windows registry. Errors in the Windows registry can lead to several problems in your operating system, including DLL errors. For example, the presence of broken registry entries can lead to missing DLL files.
Here, we have listed some common reasons for the XPSSVCS.DLL error:
- Corrupt or invalid registry entries.
- Malware or a virus corrupted the XPSSVCS.DLL file.
- Bad hard drive sectors.
- Errors in hardware devices which use DLL files.
- You accidentally deleted the file from your system.
In this article, we are going to show you how to fix the XPSSVCS.DLL is missing error. Make sure you go through all the solutions until you find the one which works for you.
Table of Contents
- Use the Microsoft Registry Server to register the XPSSVCS.DLL file manually
- Repair the corrupted XPSSVCS.DLL registry files
- Restore the XPSSVCS.DLL from the Recycle Bin
- Perform a full virus scan of your computer
- Make sure all your drivers are updated
- Restore your computer to an earlier date, using the System Restore tool
- Remove and reinstall any MSDN Disc 37 12 programs which are associated with XPSSVCS.DLL
- Scan your system, using Windows System File Checker
- Install all available updates for your operating system
- Reinstall your Windows operating system
Solution 1. Use the Microsoft Registry Server to register the XPSSVCS.DLL file manually
Usually, when you install any program that depends on the functions of the XPSSVCS.DLL file, the software registers the DLL file automatically to the Microsoft Server. Sometimes, that is not the case. The DLL file fails to register, and as a result, you will start experiencing the XPSSCS.DLL error. To fix this error, you need to register the DLL file in the Microsoft Registry Server manually. Here is how to do it:
- Right-click on the Start or Home button and select Command Prompt (Admin). This will open Command Prompt with administrator privileges.
- Once the Command Prompt window opens, input regsvr32 /u XPSSVCS.DLL and press Enter. This will unregister the file.
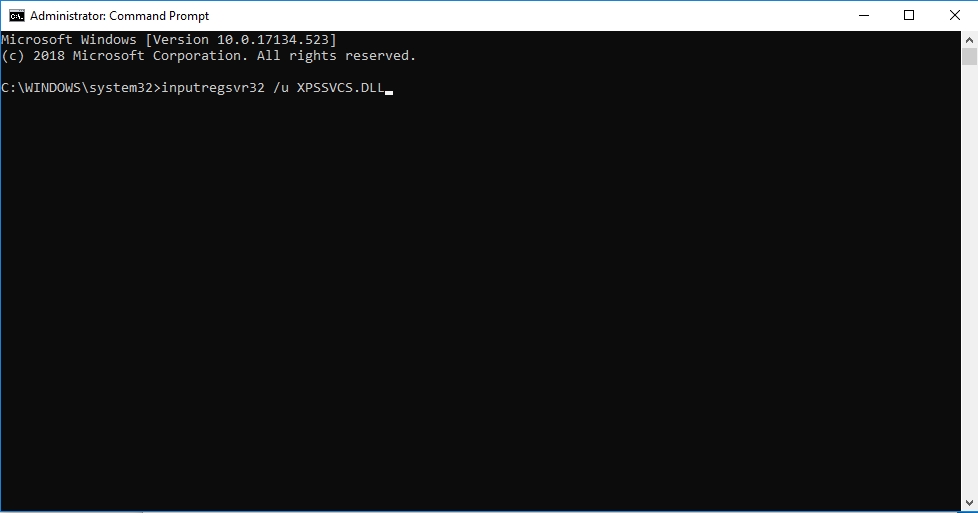
- Now, input regsvr32 /i XPSSVCS.DLL and hit Enter to re-register the file.
- Exit Command Prompt, restart your PC and check if the error has been resolved.
Solution 2. Repair the corrupted XPSSVCS.DLL registry files
Errors in Windows Registry can be the cause of many DLL errors, including the one you are facing now. Since many programs use the same XPSSVCS.DLL file, when one of them is uninstalled, their registry files are left behind and become invalid. So, if for any reason Windows tries to access any of these files, you will experience the DLL error. Viruses may also corrupt the part of the registry which is associated with the XPSSVCS.DLL file. To fix this issue, you need to remove the invalid registry entries.
Note that manually editing the registry is a very risky process because a mistake can cause your system to fatally malfunction. You should make changes to your registry only when you’re sure of what you are doing or under the instructions of an expert. It is usually safe to use a registry cleaner which will automatically remove any invalid registry entry.
To manually edit your registry, you need first to create a backup. This will help you to be able to restore your registry if you make a mistake while editing. Use the following steps to back up your registry:
- Press the Windows logo key + R on your keyboard to open the Run dialog box.
- Input regedit in the search area and press Enter. This will open the Registry Editor.
- Right-click on Computer and select Export. Now, save the file in another location. The file is saved as a .reg file.
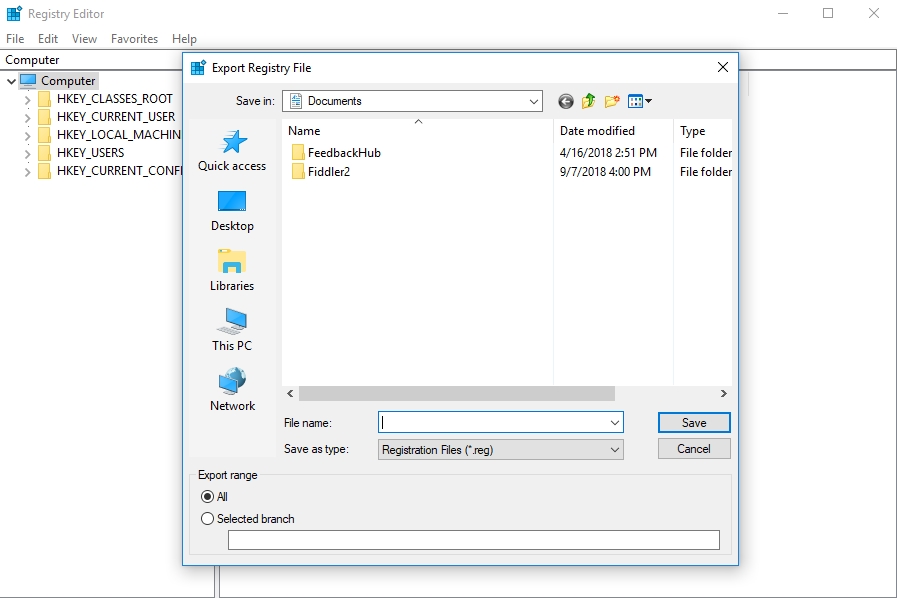
- If you ever need the file because you made a mistake, go to the location you saved the file and run it.
Solution 3. Restore the XPSSVCS.DLL from the Recycle Bin
This may be an unusual step, but it is worth checking. Many users accidentally delete files from their computer without noticing it. Especially if the deletion does not immediately cause any impact. Therefore, you need to check your Recycle Bin to see if the file is present. To do this, open the Recycle Bin and input XPSSVCS.DLL in the search box. When you find it, right-click on it and select Restore. Restart your PC and check if the error has been resolved.
Solution 4. Perform a full virus scan of your computer
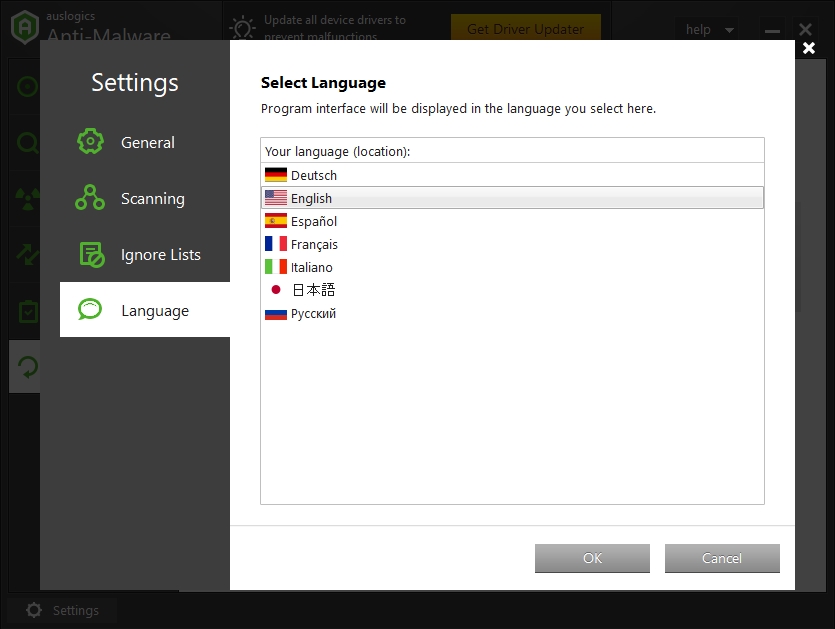
As mentioned above, viruses can easily infect files if your system is not well protected. DLL files are especially vulnerable because malware gets into your system and disguise themselves as these files. So, to delete the corrupted files, and to prevent further infection of your system, we recommend you to download and install Auslogics Anti-Malware. This tool will eliminate all the viruses which are lurking around and constantly scan your system for new viruses. It protects you from an incoming attack by hackers and lets you browse the internet in a safe environment. Its virus definition is always kept up to date so that newly created viruses cannot slip past its defenses.
Solution 5. Make sure all your drivers are updated
Corrupted or missing drivers can also cause the XPSSVCS.DLL error. Drivers can stop working abruptly for no reason. So, it is up to you to fix and update your drivers. Drivers are important in the normal functioning of the devices installed on your system. No exact driver has been identified to be the cause of the XPSSVCS.DLL error, that is why it is recommended to download and install Auslogics Driver Updater.
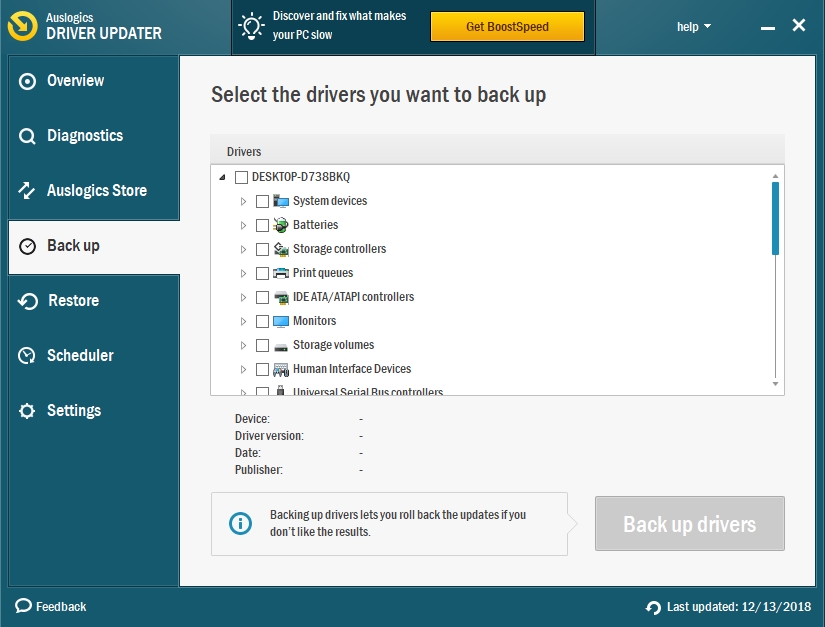
This tool will scan your computer for all outdated drivers and install their manufacturer-recommended versions. You will be able to update all your drivers in just one click. Also, using this tool, you will not have any issues like downloading and installing the wrong driver.
Another way to update your driver is to download it from the manufacturer’s website. The drivers are located in the support section of the site. This method requires that you know the version and name of the device whose driver you want to update. This is because downloading the wrong driver can cause more harm than good to your system. Manufacturers have prevented this from happening by creating clients that, when installed on your system, will notify you when a driver needs to be updated and where to find and download the driver.
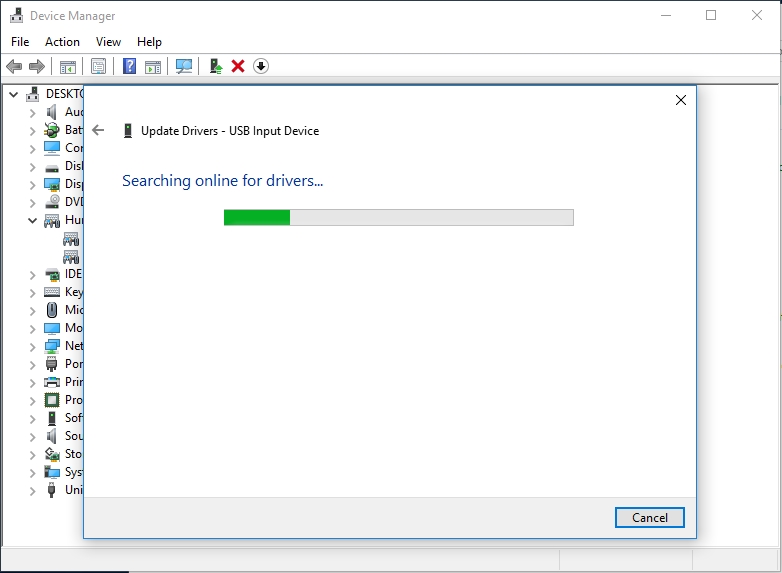
Furthermore, you can use Device Manager to update your drivers. This is a system tool which manages all the devices which are installed on your PC. Here is how to use Device Manager:
- Right-click on the Start or Home button and select Device Manager from the pop-up menu.
- Navigate to the device whose driver you want to update and right-click, then select Update driver.
- Choose to download and install the drivers from the internet in the next window.
- Windows will now download and install the latest drivers for your device.
Solution 6. Restore your computer to an earlier date, using the System Restore tool
System Restore is a very powerful and helpful tool when fixing unknown errors in your computer. It works like a time machine sending your computer to the past. So, it restores your system’s files and settings to the way they were in an earlier date. Also, you do not have to be worried that your documents will be lost because it affects only your system files and settings. To restore your system to a previous date, you needed existing restore points. If for some reason you haven’t created them yourself, do not be worried because you Windows automatically creates restore points when an important change wants to occur. Here is how to use System Restore:
- Click on the Start or Home button and input Recovery in the search box. Select Recovery from the list of results.
- In the Recovery dialog box, select Open System Restore, then click Next to proceed.
- Now, you will see a list of restore points in your system. Select a point before you began witnessing the error and click Next.
- Follow the instructions of the wizard to complete the process.
Another method to use System Restore is from the Choose an option screen. This method is usually used when your system has difficulties to start up. Here is what to do:
- Press the Windows logo Key + I on the keyboard to open the Settings app.
- Click on Updates and Security from the available options.
- In the Recovery tab, click Restart now under the Advanced startup option.
- This will restart your PC into the Choose an option screen.
- Now, navigate to Troubleshoot > Advanced options > System Restore.
- Follow the instructions of the wizard to complete the process.
Solution 7. Remove and reinstall any MSDN Disc 37 12 programs which are associated with XPSSVCS.DLL
The XPSSVCS.DLL error may be related to a specific program. So, reinstalling the program may fix the issue.
Instructions:
- Click on the Start or Home button and input Control Panel in the search box. Select Control Panel from the list of results.
- Now, click Uninstall a program.
- You will see the list of programs installed in your system.
- Select the XPSSVCS.DLL-related program and click Uninstall.
- Windows will remove the program from your system. Restart your PC and reinstall the program.
Solution 8. Scan your system, using Windows System File Checker
The System File Checker is a built-in tool which is used to check your system files for errors and repair them. Here is how to run the System File Checker:
- Right-click on the Start or Home Button and Select Command Prompt (Admin). This is to open Command Prompt as an administrator.
- In the Command Prompt window, input sfc /scannow and press Enter.
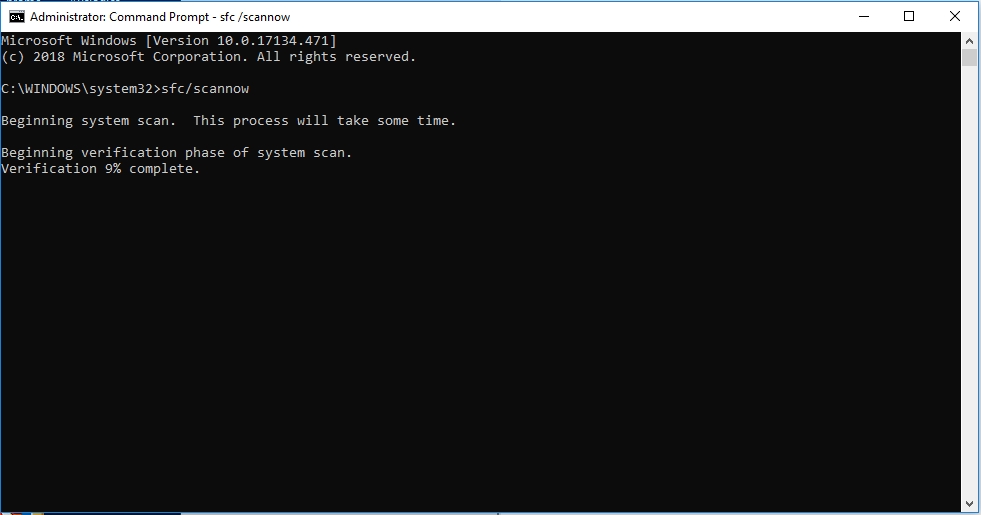
- This tool will now check and try to fix the XPSSVCS.DLL errors. When it is done, restart your system and check if the error has been resolved.
Solution 9. Install all available updates for your operating system
Windows updates are very important for your system to function properly. Also, they usually contain fixes to common problems that users often encounter. That is why we recommend you to download and install the latest updates for your operating system. Here is how to do it:
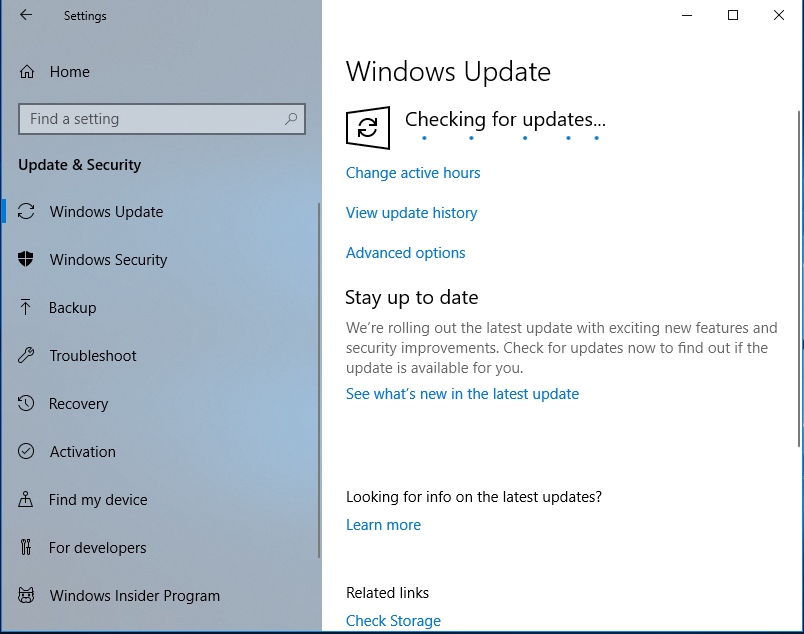
- Right-click on the Start or Home button and select Settings. This will open the settings app.
- Click on Update and Security, then under the Windows Update tab, select Check for updates.
- Windows will search for and download the latest updates for your system. Hopefully, it solves the issue.
Solution 10. Reinstall your Windows operating system
This should be the last option you try. Make sure you back up all your important files and folders before reinstalling your operating system. You are going to need Windows 10 installation media.
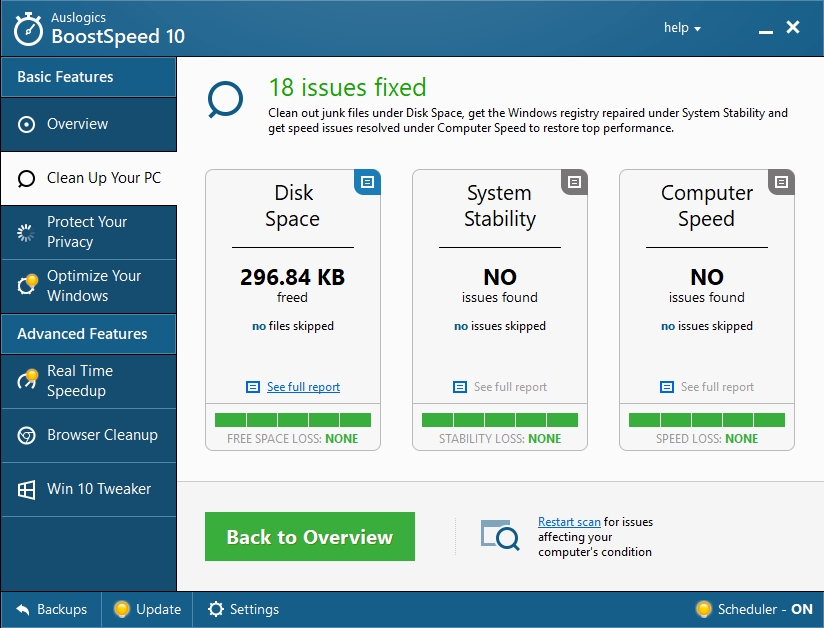
Pro tip: if your computer is slow and has poor performance, it is definitely due to the accumulated junk files and unnecessary programs which are running in the background and draining your system’s resources. That is why we recommend you to download and install Auslogics BoostSpeed. This tool will clear all the junk files in your system and close all the unnecessary background apps and services that are wasting your system’s resources.
We hope that this article has helped you to get rid of XPSSVCS.DLL is lost in Windows 10. Share it with others who need such information.
We appreciate your ideas and comments, and we are ready to answer all your questions regarding the above topic.