“The secret of success is to do the common things uncommonly well.”
–John D. Rockefeller
Windows 10 is a Microsoft operating system still in progress, and Microsoft is doing their very best to make it better for users. There are still lots of issues that need fixing, and one of them is the distorted display problem on windows 10. Display issues are among the most annoying problems that you will face as a computer user. This basically makes your computer difficult to use. Users have reported that they mostly encountered this issue when they upgraded to Windows 10, but it can also occur in all versions of Windows.
Pro Tip: It is possible to fix many PC issues by using the PC Repair tool. PC Repair is easy to use and reliable Windows optimization software developed to fix hundreds of system issues.
Special offer. About Outbyte, uninstall instructions, EULA, Privacy Policy.
You will notice the problem when watching videos, playing games or using a program that uses most of your GPU. The images are burred, cut into two, and one part is covered with horizontal or vertical lines. The most likely cause of these issues is driver incompatibility.
In this article, we are going to show you how to fix distorted monitor display problems. This problem can come in many different ways, that is why we have listed them below and provided solutions.
Distorted screen issues can be very problematic and even hinder the way you use your computer:
- Display stretched in Windows 10 – this has been reported by many users, and it is usually caused by wrong display or graphics card settings. The problem will be resolved if you change the settings.
- Distorted lines on the computer screen – these issues can occur due to various reasons such as third-party apps. Usually, users install apps to change and modify Windows interface. This can be a major contributing factor to this issue. Uninstalling these apps will solve the problem.
- Distorted monitor display problems – any PC can encounter the problem, that is why we provided the solutions to it in this article.
- Distorted display occurs after Windows update – in this case, we will know for sure that it is the update causing the issue. To fix this, you need to undo the update and block it from occurring again.
Solution 1. Install Windows updates
Microsoft is constantly improving their operating system by providing updates. These updates usually contain fixes to major issues encountered by users and also improve on user experience. That is why you should check and download the latest updates available for your PC and check if the problem is resolved:
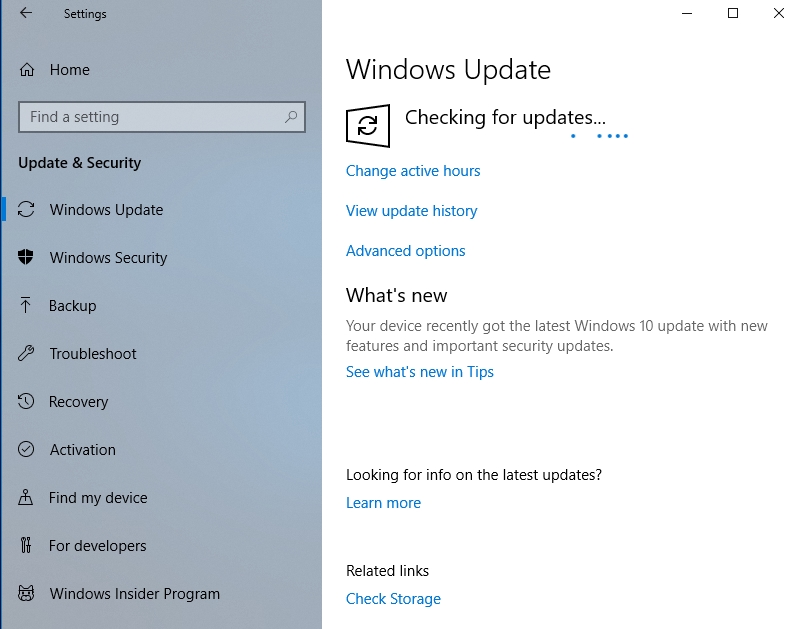
- Press the Windows key + I on the keyboard to open the Settings app.
- Click on Update and Security.
- Click on Check for updates button.
- Windows will now check and download the latest updates for your PC.

- Restart your computer and check if the issue is resolved.
Solution 2. Download and install your latest drivers
Your display drivers could also be the culprit in this case. Normally, if you are experiencing display issue, you need to make sure that all your drivers are up to date. Especially your graphics drivers. Here is how to update them.
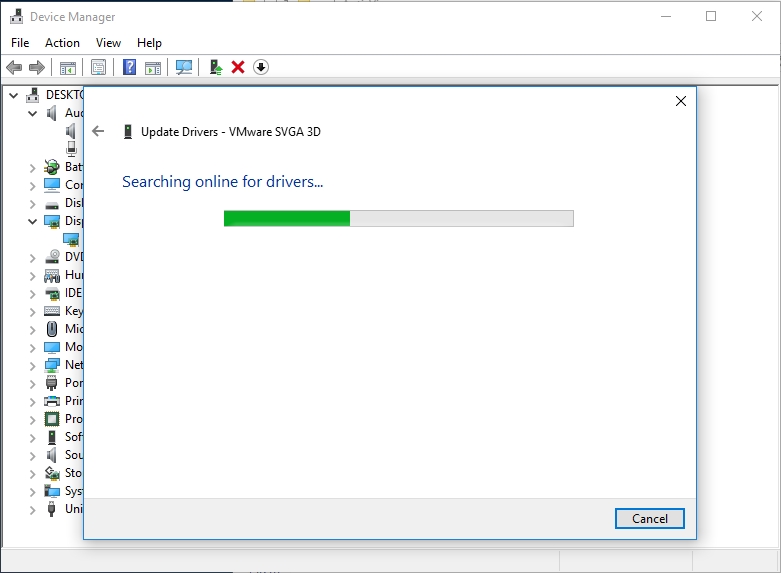
1.You can do it, using Device Manager.
- Press the Windows key + X on your keyboard and select Device Manager
- Double-click on Display adapters to view the Display device installed on your computer
- Right-click on it and select Update driver
- In the next window, select Search automatically for updated driver software
- Windows will now search, download and install the latest driver for your device
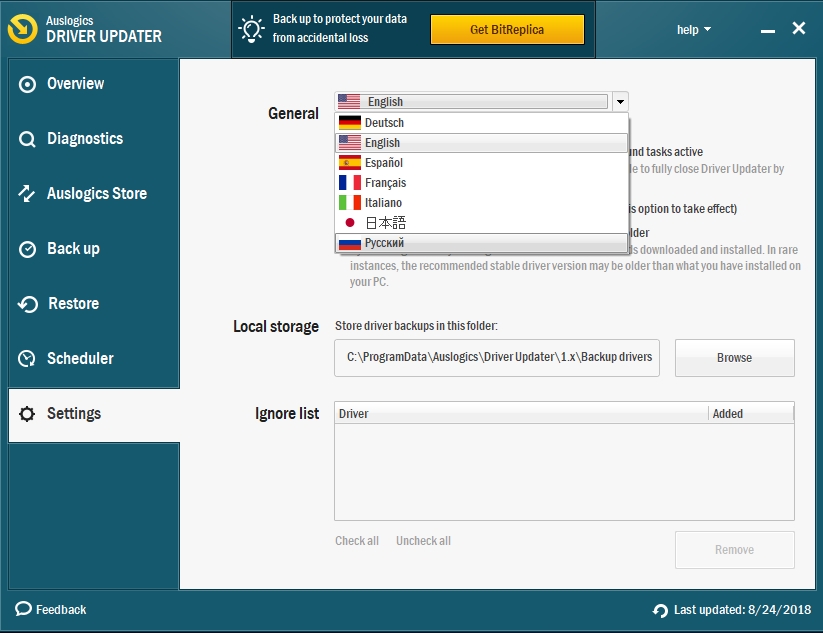
2. Download and install Auslogics Driver Updater. This tool will scan your computer for missing and outdated drivers, download and install the manufacturer-recommended versions in just one click. This will save you lots of time.
3.Download the driver manually from the manufacturer’s site. The downloads are usually located in the Support section of the site. Make sure you download the appropriate version for your device. If you download something different, then your device will not function properly.
Solution 3. Use compatibility mode to install the drivers
Once you have downloaded the drivers from the manufacturer’s site, you need to install them in compatibility mode. To do this, use the following steps:
Right-click on the .exe file and select Properties from the pop-up menu
Go to the Compatibility tab and check the Run this program in compatibility mode box. Now, select the operating system (Windows 7 or 8 is the best). Click Apply and OK to confirm the changes made.
Solution 4. Disable X-Reality for mobile
This fix is for those who own a Sony Vaio device. It is advisable to disable X-Reality for mobile if you are experiencing the distorted screen issue. Sony will soon provide a patch for this, but for now, your only option is to go to the Sony Control Center on your PC and disable this function. Many users have reported that it solved their screen issues.
Solution 5. Reinstall the driver
If your display driver is up to date and you are still experiencing distorted screen issues, then you need to reinstall the driver and see if it helps. This problem might be caused by corrupted drivers. So, the only way to find out is to follow the steps below:
- Press Windows key + X on your keyboard and select Device Manager from the pop-up menu
- Click on the arrow next to Display adapters to view the display device installed on your computer
- Right-click and select Properties
- Go to the Driver tab and click on Roll Back Driver. If this option is unavailable, then you need to delete the device completely from your system, using the following steps:
a. Use the above steps to open Device Manager and Display adapters
b. Right-click on your display device and select Uninstall device
c. In the next dialog box, check the Delete the driver software for this device box and select Uninstall
Restart your PC when this is done. Once your computer restarts, Windows will automatically download and install the latest drivers for the device.
Solution 6. Activate a custom refresh rate
Also, your refresh rate may be the culprit. Many users have confirmed that the problem was fixed by setting a new refresh rate for their monitor. You need to be careful when doing this because it can also cause other problems. Here is how to set a new refresh rate:
- Open the Nvidia Control Panel
- Select Change Resolution under the Display option
- Click Customize
- Select Create Custom Resolution and change or create a different refresh rate or resolution
It is advisable to change the refresh rate from 60Hz to 61Hz because this has solved the problem for many other users. Also, you will need to repeat the process again if you encounter this problem in the future.
Solution 7. Reset your BIOS to default settings
Overclocking could also cause you to experience distorted screen images. This is because it causes your CPU and GPU to overheat, making them to malfunction. In order to change these settings, you will need to read your motherboard manual because the procedure varies on different motherboards.
Solution 8. Modify Output color depth
Changing the Output color depth form the Nvidia Control Panel may help you resolve this issue. Use the following steps to do this:
- Open the Nvidia Control Panel
- Click Change Resolution under the Display category
- Go to Use Nvidia color settings and change the Output color depth to 8 bpc
- Click Apply to confirm the changes
- Check it this has solved the issue
Solution 9. Check your monitor
The problem may also be caused by your monitor. Check if the cables are connected properly or not destroyed. You can also try connecting a different monitor to check if it works. You might also try changing the settings of the monitor to fix the problem.
Solution 10. Uninstall problematic apps
If you have installed any apps that modify your Windows interface, it is advisable to uninstall it. Even though these types of apps work normally, sometimes they turn to cause more harm than good to our system. Use the following steps to uninstall the program:
- Click on the Start or Home button and type “control panel” in the search box
- Select Control Panel from the list of available options
- Click Uninstall a program
- Select the app from the list of programs and click Uninstall
- Follow the instructions of the Wizard to remove the app from your computer
If you want to completely remove the app from your computer, then you may need to download and install a third-party uninstaller.
Solution 11. Make sure your graphics card is working properly
If your graphics card is not functioning properly, you will encounter the distorted screen issue. To make sure that the problem is not from your graphics card, you will need to check the behavior of your screen during the booting process. If you witness the distorted screen during the boot process, then it is very likely that your graphics card is faulty and you will have to replace it.
Recommendations: most users now complain that their computer has become slower than when they first bought it. If you are experiencing that kind of issue, then you need to download and install Auslogics BoostSpeed. This tool is going to tune your PC to work at maximum performance. It will eliminate errors and crashes and make sure that your system is very stable.
We hope that this article has solved your distorted screen issue. Share with others who encounter similar problems.
We appreciate your ideas and comments.