“The difference between a successful person and others is not a lack of strength,
not a lack of knowledge, but rather a lack of will.”
–Vince Lombardi
Pro Tip: It is possible to fix many PC issues by using the PC Repair tool. PC Repair is easy to use and reliable Windows optimization software developed to fix hundreds of system issues.
Special offer. About Outbyte, uninstall instructions, EULA, Privacy Policy.
A local area network (LAN) is a computer network which works within a limited area such as in offices or schools and interconnects the computers which are present. Most often, when people face problems with their connection, they are advised to use an Ethernet or LAN connection to make it better. What happens when your LAN connection becomes slow too? In this article, we are going to be showing you how to fix LAN transfer speed of files in Windows 10.
Due to an improvement in technology, internet users are getting very high internet connection speeds. This makes surfing the internet very pleasant and online gaming and internet video calls possible. It is a documented fact that transferring files using LAN connections is way faster and stable than using a Wi-Fi connection. However, you may begin to notice that your file transfer speed over the LAN connection is getting slow. This may occur due to various reasons: outdated network drivers, browser settings, hard drive issues, a faulty Ethernet cable, etc.
Many users have reported about the slow LAN speed issues after they upgraded their operating system to Windows 10.
If you are using an Ethernet connection to surf the internet, then this can be a very big issue for you. Here are some of the reports users have sent to us and to other forums:
- LAN Speed is slow on Windows 10 and 7 – This problem can arise in any version of the Windows operating system. You will be able to fix this issue by updating your drivers and installing the latest Windows updates.
- Slow LAN transfer speed with Netgear router – We have noticed that users who report this issue mostly use Netgear routers. So, we may come to a conclusion that this issue may be occurring due to your router settings or hardware failure.
- Slow file transfer over Gigabit network – Also, the Gigabit network can be the culprit in this case. You will have to check your network adapter settings.
- Router slow LAN speed – This occurs often. If you encounter this, disable the Large Send Offload (LSO) settings. Your issue should be resolved once the feature is turned off.
Table of Contents
- Check your hardware
- Install the latest Windows operating system
- Update your network drivers
- Disable Windows Auto-Tuning Feature
- Disable Large Send Offload (LSO)
- Change your DNS settings
- Disable or uninstall your VPN
- Change duplex settings
- Disable IPv6
- Enable the QoS feature
- Refresh or reset your OS
Solution 1. Check your hardware
Remember that even though your router is a machine, it also needs a little bit of rest. Try turning it off from time to time. This will make it work at maximum performance for a long time. Note that if your router has issues, your LAN transfer speeds will be slow. Also, you can try to change the port you are using. This is because it may not be functioning properly.
Furthermore, the cables you are using may also be a factor causing your LAN transfer speeds to slow down. We recommend you to use Cat-6 cables. If you notice that your router is not functioning properly, you will have to change it completely.
Solution 2. Install the latest Windows operating system
If your operating system is outdated, you may also experience slow LAN connections. Downloading the latest updates for your OS will help solve so hardware issues that may be affecting your computer. It is very important to keep your system updated. Windows 10 is set to automatically download and install updates, but sometimes this does not occur due to various reasons, and an update is left pending. In this case, you will have to download it manually. Use the steps below to download your pending updates:
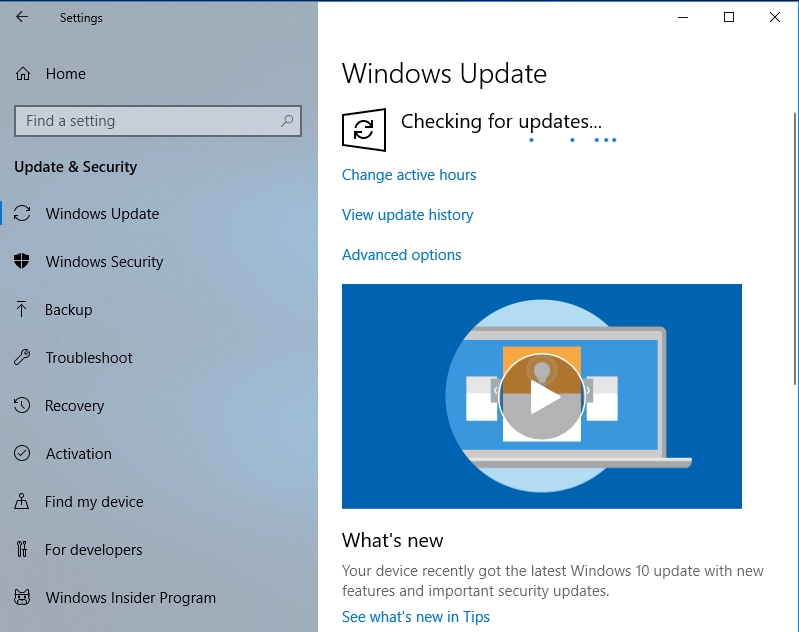
- Right-click on the Start or Home button and select Settings from the pop-up menu. This will open the Settings app
- Select Update and Security from the list of available options
- Navigate to the Windows update tab and click Check for updates
- Windows will now look for updates for your PC and install them

- Hopefully, this fixes the issue
Solution 3. Update your network drivers
If your network drivers are outdated, you LAN connections will not function properly. It is very important to keep your drivers updated because they work as the middle man between your hardware and the operating system. There are various ways to update your drivers, and we will show you the best:
Method 1. Download and install Auslogics Driver Updater
Method 1. Download and install Auslogics Driver Updater. This tool will scan your computer for outdated or missing drivers and install the manufacturer-recommended versions. It is very easy to use and will install all your drivers in just one click. Here is how to install it on your system:
- Use the above link to download the setup file
- Navigate to your download folder and run the setup file. This will open the Auslogics Driver Updater installer
- Choose your preferred language and select the Click to install and check drivers button
- When the installation is done, the Diagnostics tab will automatically open in the Auslogics Driver Updater software and begin scanning your PC for missing drivers
- Once this is done, you will see a list of drivers which need updating on your PC
- Click Update all, and this software will update all your missing drivers
Method 2. Download the driver from the manufacturer’s site.
For this method, you will need to know the name and version of the network device installed on your PC. This is because if you download a wrong driver, your device will not function properly. You will find all the drivers in the support section of the site. Nowadays, driver manufacturers create clients which the users can install on their PC. It will notify them when a driver needs to be updated and direct them to the exact location where they can find the updated version of the driver and download it.
Method 3. Use Device Manager
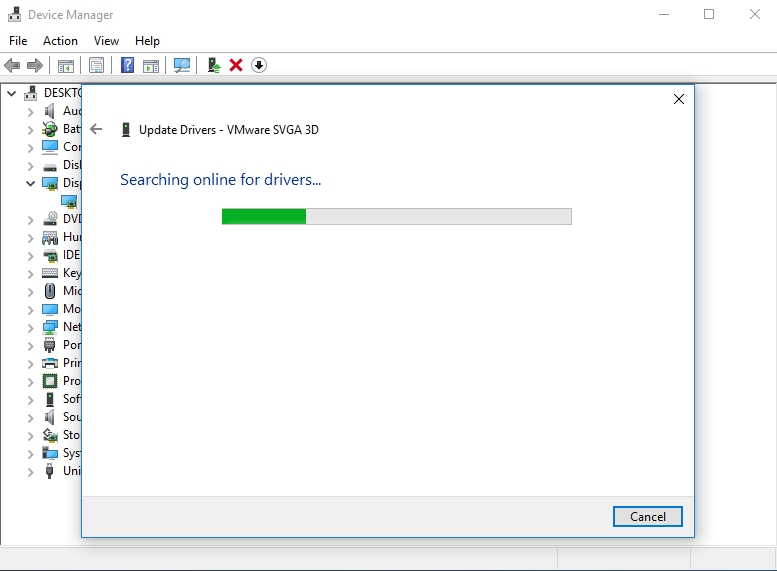
- Press the Windows key + X on your keyboard and select Device Manager from the pop-up menu. This will open the Device Manager panel
- Double-click on Display adapters to expand it and view the network device which is installed on your PC. Right-click on it and select Update driver software
- Now, choose Search automatically for updated driver software in the next window
- Windows will now search and download the latest version of your driver
Solution 4. Disable Windows Auto-Tuning Feature
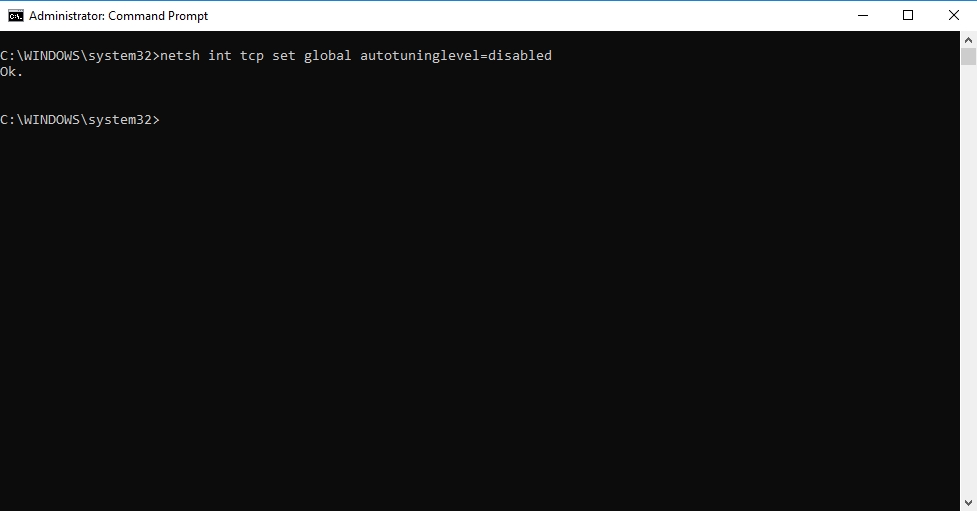
Disabling the Windows Auto-Tuning feature will be able to fix this issue. It is a feature built into Windows which can be turned off using Command Prompt. Use the following steps to turn it off:
- Right-click on the Start or Home button and select Command Prompt (Admin) from the pop-up menu. This will let you run Command Prompt as an administrator
- Input the following command in the Command Prompt window: netsh interface tcp show global and press Enter
- Disable the Receive Window Auto-Tuning Level feature by typing netsh interface tcp show global autotuninglevel=disable and pressing Enter
- Now check to see if your connection is back to normal
Solution 5. Disable Large Send Offload (LSO)
The Large Send Offload (LSO) feature can also be a contributing factor when you are experiencing slow LAN speed on your PC. Disabling this feature will help you fix this issue. Here is how to do it:
- Right-click on the Start or Home button and select Device Manager from the pop-up menu
- Click on the arrow next to the Network adapters to expand it
- Double-click on your network device and navigate to the Advanced tab
- Click Large Send Offload V2 (IPv4) and disable it
- Repeat the same process for Large Send Offload V2 (IPv6)
- Click OK to confirm the change
Solution 6. Change your DNS settings
Your DNS settings may also be the reason why your LAN speed is slow. Your Internet Service Provider is usually responsible for this. Fortunately, you can change your DNS. It is a simple process, and we will show you how to do it:
- Click on the Start or Home button and type Network and Sharing Center. Select the most obvious result
- Now, navigate to Change adapter settings, right-click your Ethernet network and select Properties
- Choose Internet Protocol Version 4 (TCP/IPv4) and navigate to Properties
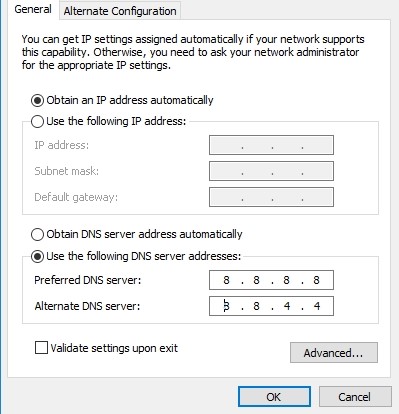
- Now, choose Use the following DNS server addresses and edit the following values:
- Preferred DNS server: 8.8.8.8
- Alternate DNS server: 8.8.4.4
Solution 7. Disable or uninstall your VPN
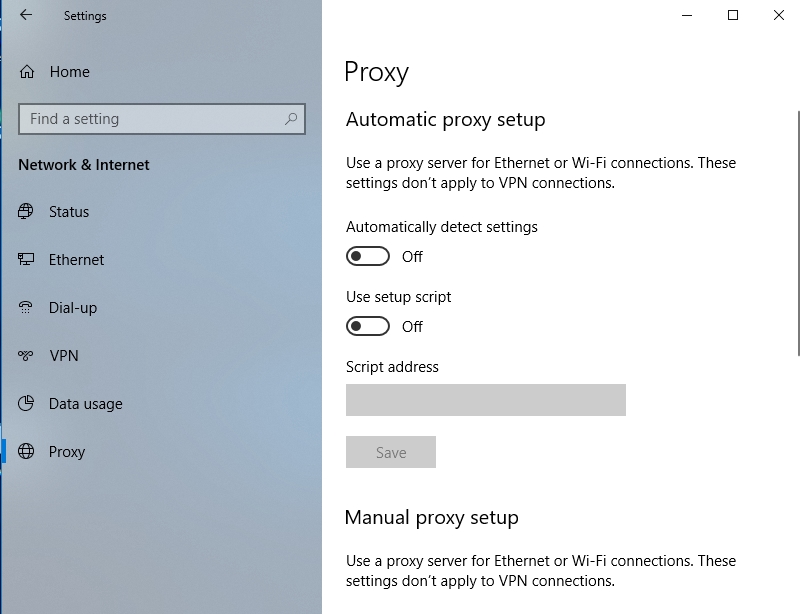
Sometimes, VPN programs slow down the internet connection drastically. It is preferable to switch your VPN off completely and check if your connection gets better. Your proxy can also be the culprit in this case. You will be able to disable your Proxy, using the following steps:
- Press the Windows logo key + I on your keyboard to open the Settings app
- Select Network and Internet from the list of options
- Choose the Proxy in the left pane and disable all the options
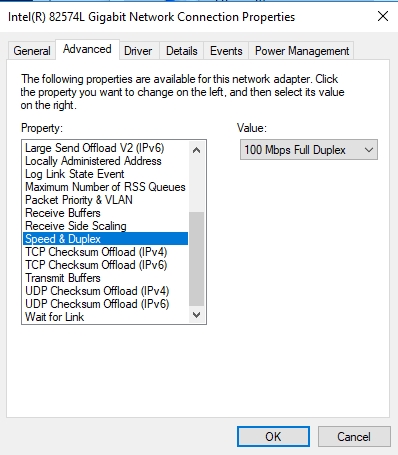
Solution 8. Change duplex settings
Duplex settings have also been noted to cause slow LAN speeds. This issue can be fixed using the following steps:
- Navigate to your Network adapter properties
- Go to the Advanced tab and choose Speed/duplex settings. Change the value to 100 Mb Full Duplex. Click OK to save the changes you made
- Your LAN speeds should work fine after changing your duplex settings
Solution 9. Disable IPv6
IPv6 is the modern type of an IP address. In some areas, you may encounter issues with IPv6. It is advisable to disable this feature entirely using these simple steps:
- Click the Network icon and select Network form the taskbar. Select Network from the pop-up menu
- Select Change adapter options
- Now, right-click on your network connection and select Properties
- Look for Internet Protocol Version 6 (TCP/IPv6) and disable it
- Click OK to save the changes you made
Solution 10. Enable the QoS feature
Enabling the QoS feature might be able to solve the issues with your LAN transfer speed. The function of this feature is to limit your network speed. Many users have reported that the issue was resolved after they enabled this feature. This feature can be enabled from your router’s configuration page. Note that it is not present in all routers.
Solution 11. Reset your operating system
If you have tried everything above and it still has not solved the issue, you will have to reset your operating system. Use the following steps to reset your PC:
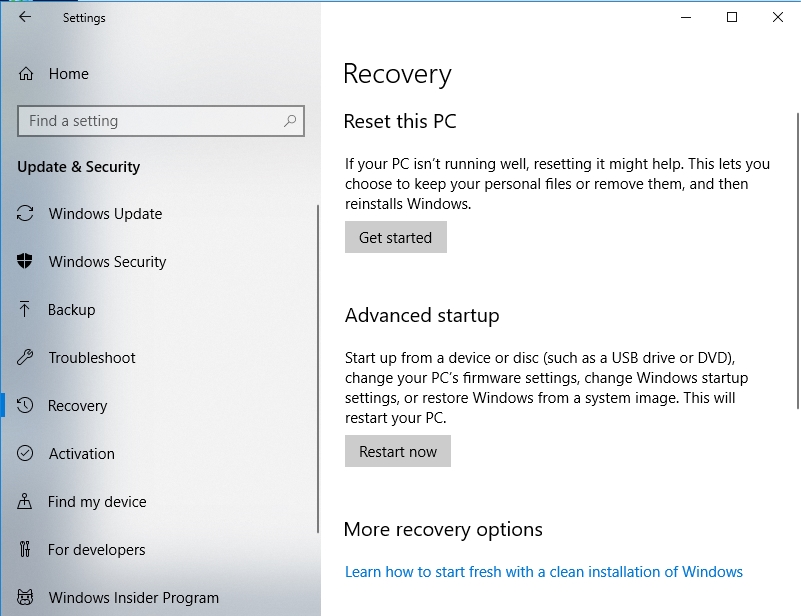
- Right-click on the Start or Home button and select Settings from the pop-up menu
- Select Update and Security from the options available
- Click on the Recovery tab on the left pane
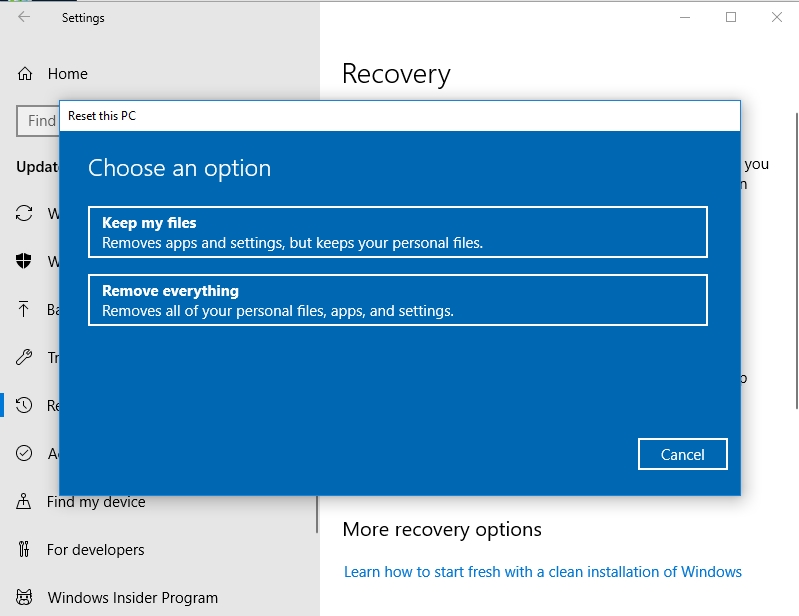
- Select Get started under the Reset this PC option
- Follow the instructions of the wizard to complete the process (make sure you choose the option to keep your files and folders)
We hope that this article has solved your LAN Speed issue. Share it with others who encounter similar problems.
We appreciate your ideas and comments.
We are ready to answer all your questions regarding the above topic.