“The most important thing about getting somewhere is starting right where we are.”
–Bruce Barton
There are lots of reasons why you adjust the brightness of our PC or laptop screen. It may be because too much brightness hurts your eyes or you are conserving power of your laptop. It could also be that you can see images well when the screen is dimmed. It becomes frustrating when users can’t change or adjust the brightness of their laptop screen.
Pro Tip: It is possible to fix many PC issues by using the PC Repair tool. PC Repair is easy to use and reliable Windows optimization software developed to fix hundreds of system issues.
Special offer. About Outbyte, uninstall instructions, EULA, Privacy Policy.
Many people who own a Lenovo laptop have reported that they encountered a situation in which their laptop screen went very dim. This issue arises often after they updated their operating system to the latest version. The brightness becomes so low that it is very difficult to see anything, and that may even hurt your eyes.
Don’t be frustrated if you encountered this issue because, in this article, we are going to show you how to fix dim screen on Windows 10. Before you begin any of the solutions, we always advise all of our readers to create a backup of their important files. This is to make sure that you if you make a mistake while performing any of the solutions and lose data, you will be able to recover it without any difficulty.
Table of Contents
- Restore your computer to a date before the Windows Update
- Update your graphics driver
- Press the brightness-up button on your keyboard during startup
- Modify Registry
Solution 1. Restore your computer to a date before the Windows Update
Most users encountered this problem after they updated their operating system to the latest version. Restoring your PC to a date before the update may help with the problem. A lot of people are usually worried that their data will also be altered if they restore to a previous date. You need to rest assured that your data will not be altered. This process affects only the computer settings and system files. Your documents, music, and videos will not be changed. There are various ways to perform a system restore:
Method 1
- Press the Windows key + I on your keyboard to open the Settings app
- Click Update and Security from the list of options available
- Navigate to the Recovery tab and select Get started under Go back to the previous version of Windows 10

- Follow the instructions of the wizard to complete the process
- Check if the problem has been solved
- Note that this option will be available only 10 days after the Windows update. So, if you don’t find it, use the other methods below
Method 2
- Click the Start or Home button and type recovery in the search box
- Select Recovery from the list of available results. This will open the Recovery dialog box in Control Panel
- Click Open System Restore and in the next window, click Next to proceed
- Now, you will see a list of restore points you can choose from. Select a date before the update and click Next
- Follow the instructions of the wizard to complete the process
- Note that to use this method, you should have created restore points in the past. Fortunately, Windows creates automatic restore points when important changes want to take place on your PC. For example, when your system wants to install an update
Method 3
- Click the Start or Home button and select the Settings icon from the Start menu. This will open the Settings app
- Select Update and Security from the list of options
- Go to the Recovery tab and click Restart now under the Advanced startup option
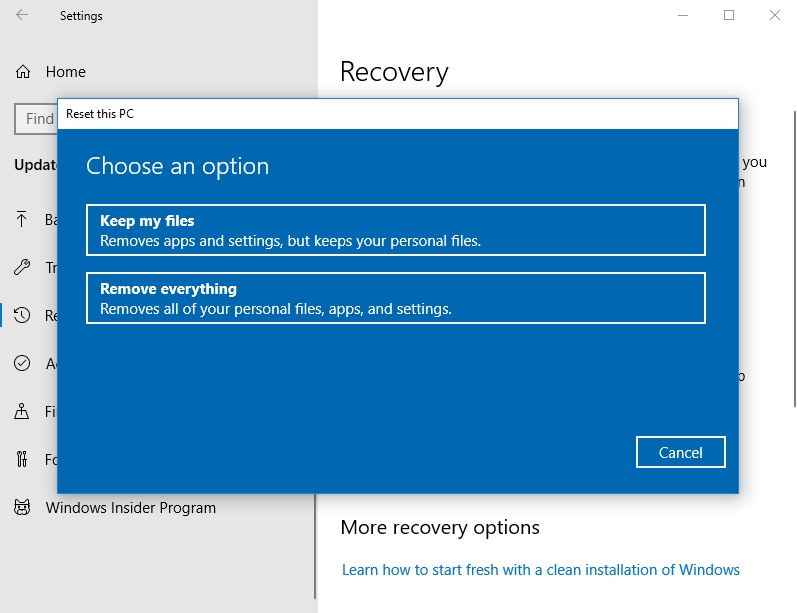
- Your PC will automatically restart into the Choose an option screen
- Now, go to the following location: Troubleshoot > Advanced Options > System Restore
- Follow the instructions of the wizard to complete the process
Solution 2. Update your graphics drivers
Most frequently, your graphics driver is the cause of the dimmed laptop screen. If your graphics drivers are outdated or faulty, you will experience this issue. That is why we will show you all the methods to update your drivers:
Method 1. Download and install Auslogics Driver Updater.
This tool will scan your computer for missing or outdated drivers and download the latest manufacturer-recommended versions. It saves you a lot of time because you will be able to install all your drivers in just one click.
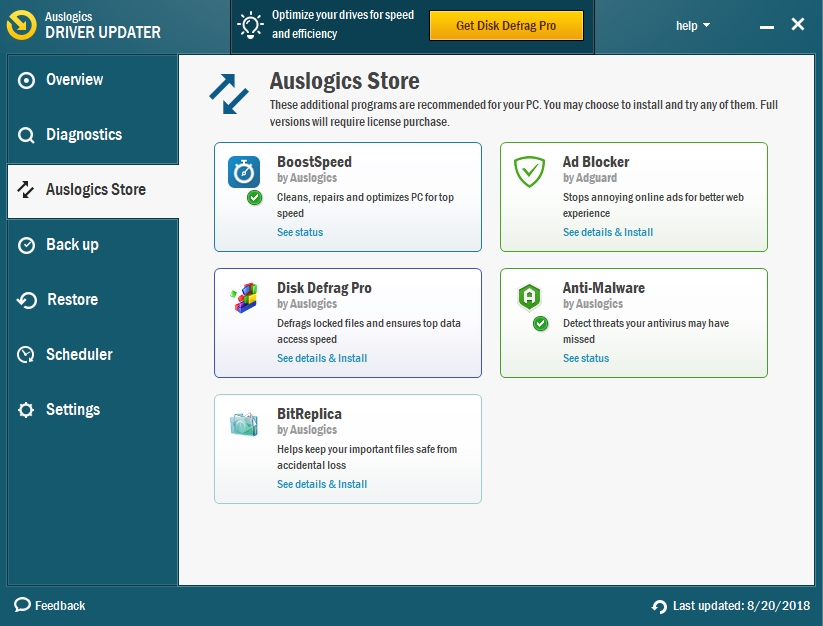
The best part about it is that it is very simple to use. Here is how to use this tool:
- Download the setup file from the link provided above
- Navigate to your download folder and run the setup file. This will open the Auslogics Driver Updater installer
- Choose your preferred language and select the Click to install and check drivers button
- When it finishes installing, it will automatically open the Diagnostics tab in the Auslogics Driver Updater software and begin scanning your PC for missing drivers
- Once this is done, you will see a list of drivers you need to update on your PC
- Click Update all, and this software will update all your missing drivers
Method 2. Download your graphics driver from the manufacturer’s site. For this method, you will need to know the name and version of your graphics card. This is because your device will malfunction if you install a wrong driver on it. Most often the drivers are located in the support section of the site. Also, manufacturers create software which users can install on their computers and which will notify them if their drivers are outdated and show them where to download the drivers.
Method 3. Download and update your drivers, using Device Manager
- Right-click on the Start or Home button and select Device Manager from the pop-up menu. This will open the Device Manager dialog box
- Double-click on Display adapters to expand it, and you will see the graphics device which is installed on your PC
- Right-click on it and choose Update driver software
- Now, choose Search automatically for updated driver software in the next window
- Windows will now download the latest driver for your graphics card

After you update your graphics driver, your brightness should return to normal
Solution 3. Press the brightness-up key on your keyboard during startup
This is another method to fix your dimmed Lenovo laptop screen. To do this, use the following steps:
- Shut down your PC
- When it is completely turned off, press the power button to turn it on again
- When it starts booting, press and hold the brightness-up button; usually it is one of the function keys (F1-F12)
- When your computer completes the booting process, you will notice that the brightness of your screen has returned
Solution 4. Modify your Registry
Changing a Registry value may help you with this issue. You need to be extremely careful when editing registry values because a mistake here may cause your computer to malfunction. You will need to create a backup of your registry files before you begin this solution.
- Press the Windows logo key + R on your keyboard to open the Run dialog box
- Type regedit in the search box and press Enter
- Once the Registry Editor opens, right-click on Computer and select Export
- Name the file and select a location you wish to save the file to and click Save
- The backup file will be saved as a .reg file
Now, you can proceed to edit your Registry without any worries
- Press the Windows key + R on your keyboard to open the Run dialog box
- Type regedit in the search area and press Enter. This will open the Registry Editor
- In the Registry, go to the following location “HKEY_LOCAL_MACHINE\SYSTEM\ControlSet001\Control\Class\{4d36e968-e325-11ce-bfc1-08002be10318}\0000” OR “HKEY_LOCAL_MACHINE\SYSTEM\ControlSet001\Control\Class\{4d36e968-e325-11ce-bfc1-08002be10318}\0001”
- Double-click on FeatureTestControl
- Edit the value data to f048, then press OK
- Once you are done, restart your computer and check if the issue has been resolved
We hope that this article has fixed the Lenovo laptop screen went dim issue. Share it with others who face the same problem.
We appreciate your ideas and comments.
We are ready to answer all your questions related to the above article.
i turned it off and shut it and pressed the speakers in and the keyboard worked again